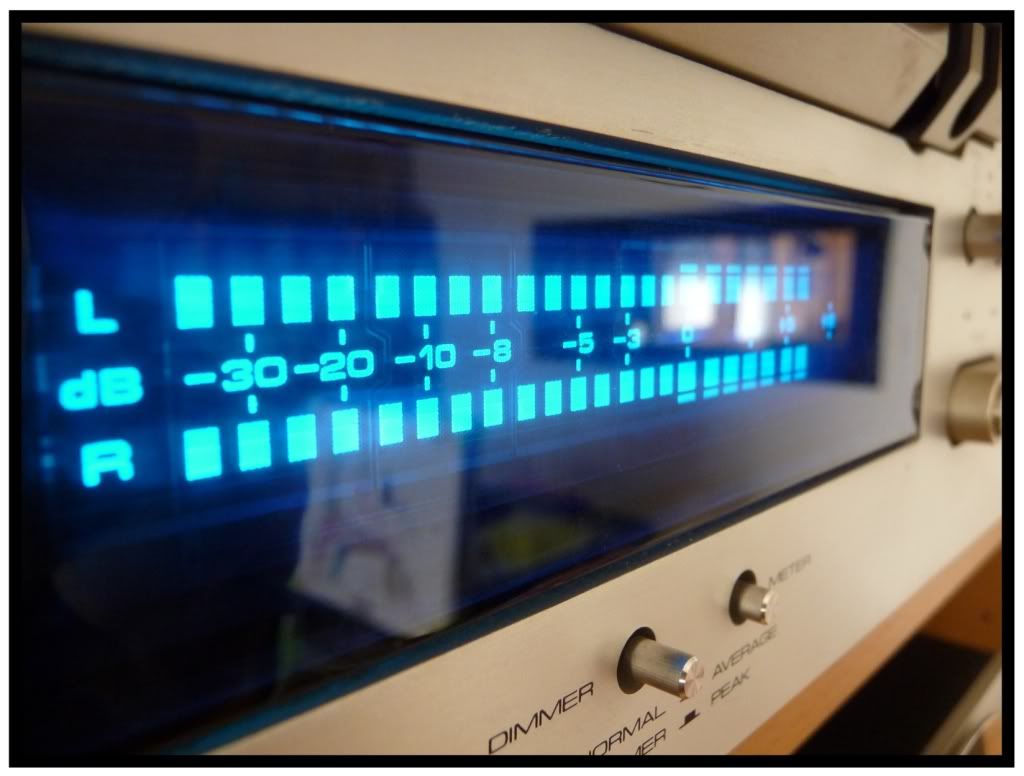
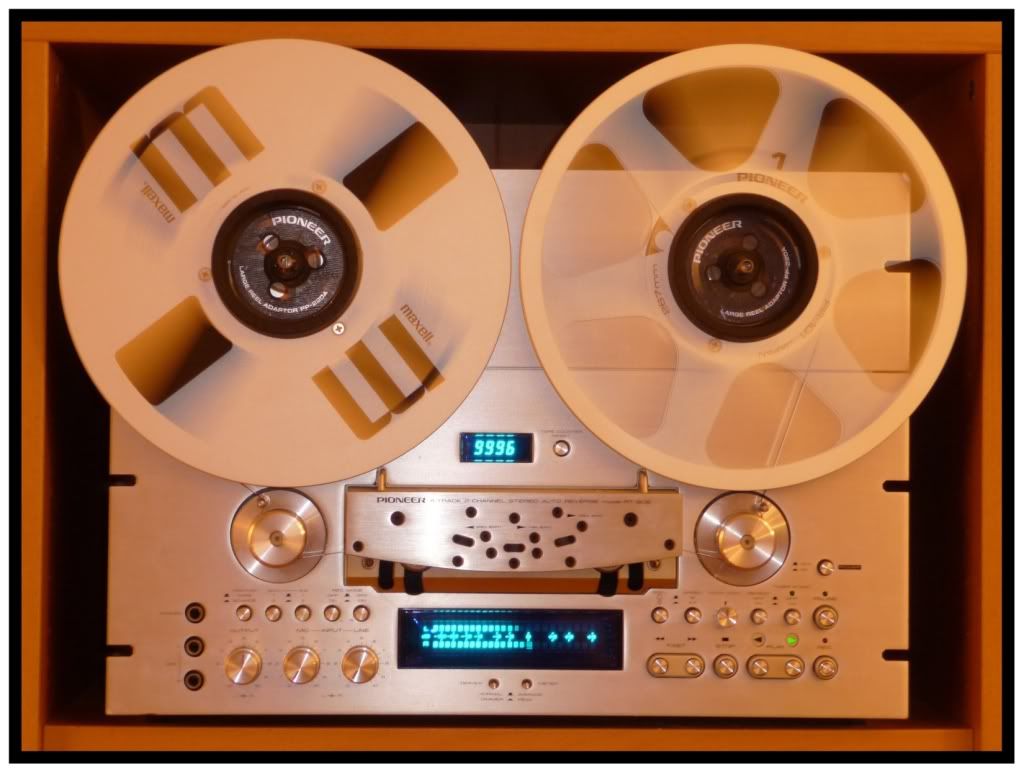
Monday, December 29, 2008
Friday, December 12, 2008
VID/DES: Maxell 10.5" black metal reel
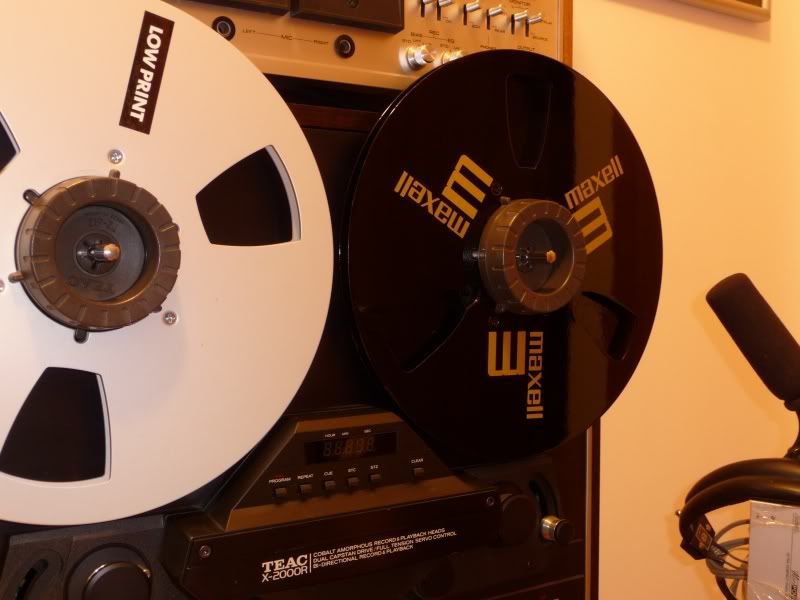
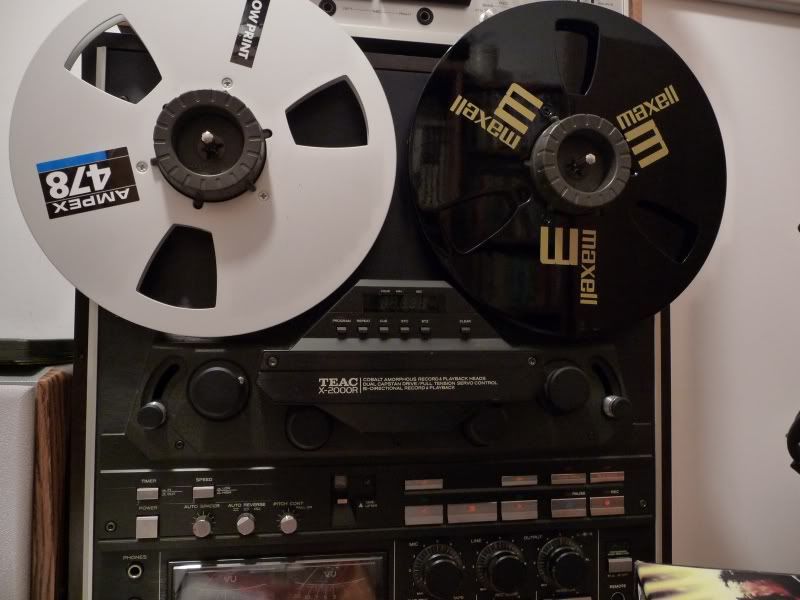
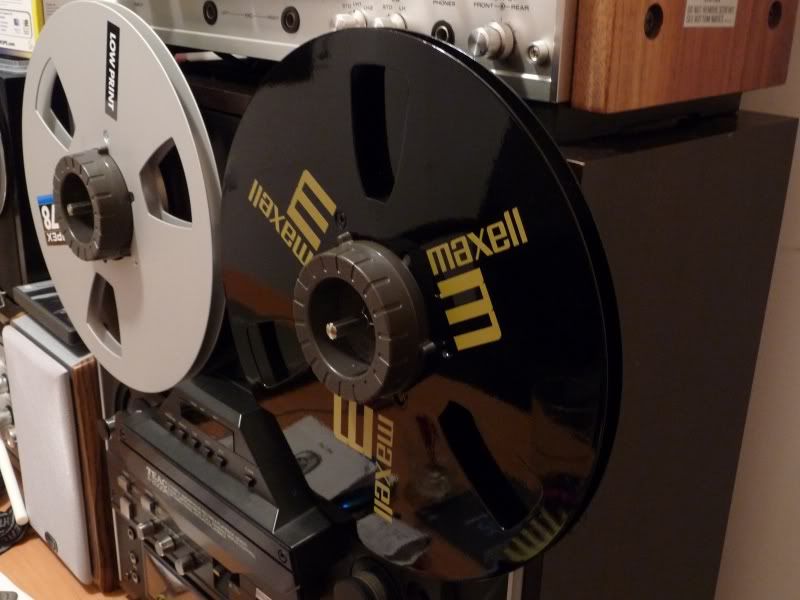
This is one of the rarest reel that I have and of course wasn't commercially released, it was made by someone. The reel was probably in origin a Maxell silver reel, one of the first designs, almost the same than the common 3 holes from Agfa and ReVox.
The reel presented here is painted in black but with a layer of bright varnish, so the final result is really cool. All the lettering is in gold colour, with the characteristical big "m" of maxell and the brand written too. Lettering is in both sides and placed three times in a 120º configuration.
Pictures worth more than one thousand words:

And here is a video with this reel used as take-up reel in a Teac X-2000R:
Saturday, November 8, 2008
REP: Changing Pioneer RT-707 direction lamps for leds
Today I was working a Pioneer RT-707, putting some grease in the capstan motor and adjusting the fly wheel when both direction lamps burned. It's rare that both lamps burn at the same time, but I think that this happened because they were in their last hours, and after manipulated the deck, putting it up, down... etc, finally the filaments broke.
Fortunatelly I had some leds left at home, so I began to replace both direction lamps with leds. The voltage to the lamps is about 26VDC, so a balast resistor is needed in serial with each led. I used 5mm width leds, that enter perfectly in the hold.
In a first time I tried a 1.3Kohms. 1/4 watt. After testing, it got too hot, so I tried a 2.2 Kohms. and with more wattage. Tested that first one led with it and all was working well.
Here is the procedure I followed to change the direction lamps with leds.
1- Remove the deck cover. Four philips screws in each side and three more in the upper.
2- Remove the front panel. Two philips screws and three more in the bottom. Remove the pots knobs of MIC and LINE controls. Also the pinch control knob. To remove the front panel now, both pinch roller must be pushed up manually and with care, pull the panel.
3- Both direction lamps are in a small black socket. To remove it, unscrew the two philips screws.
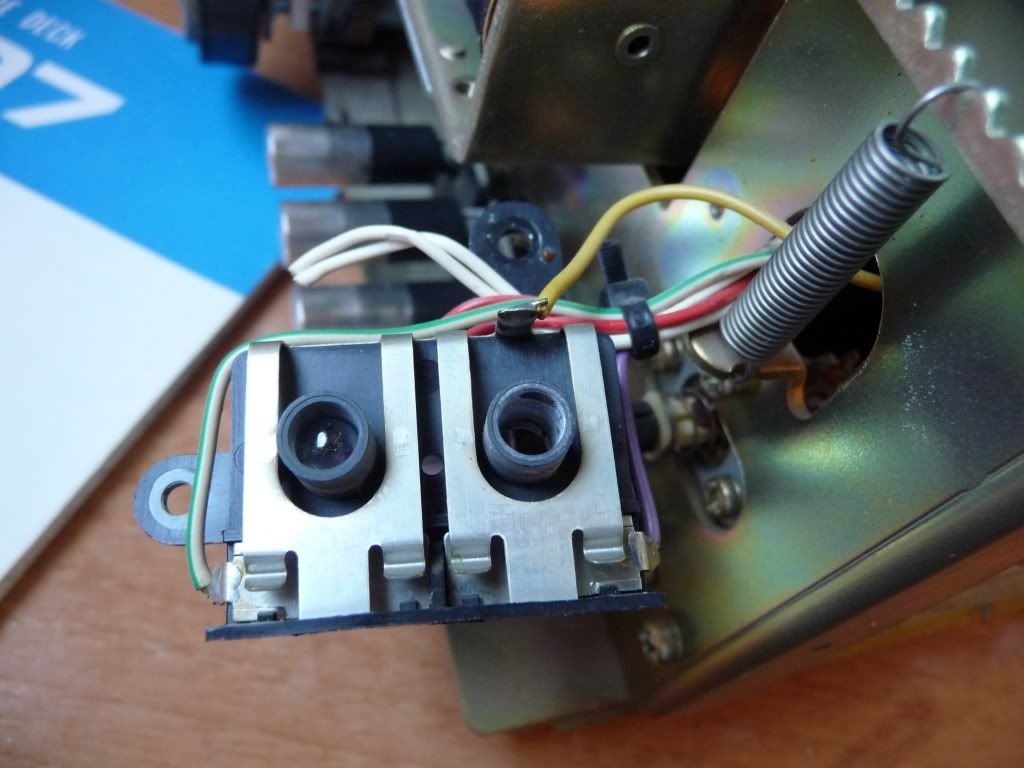
Each lamp is inside his hole and can be removered simply pulling the lamp from their wires.
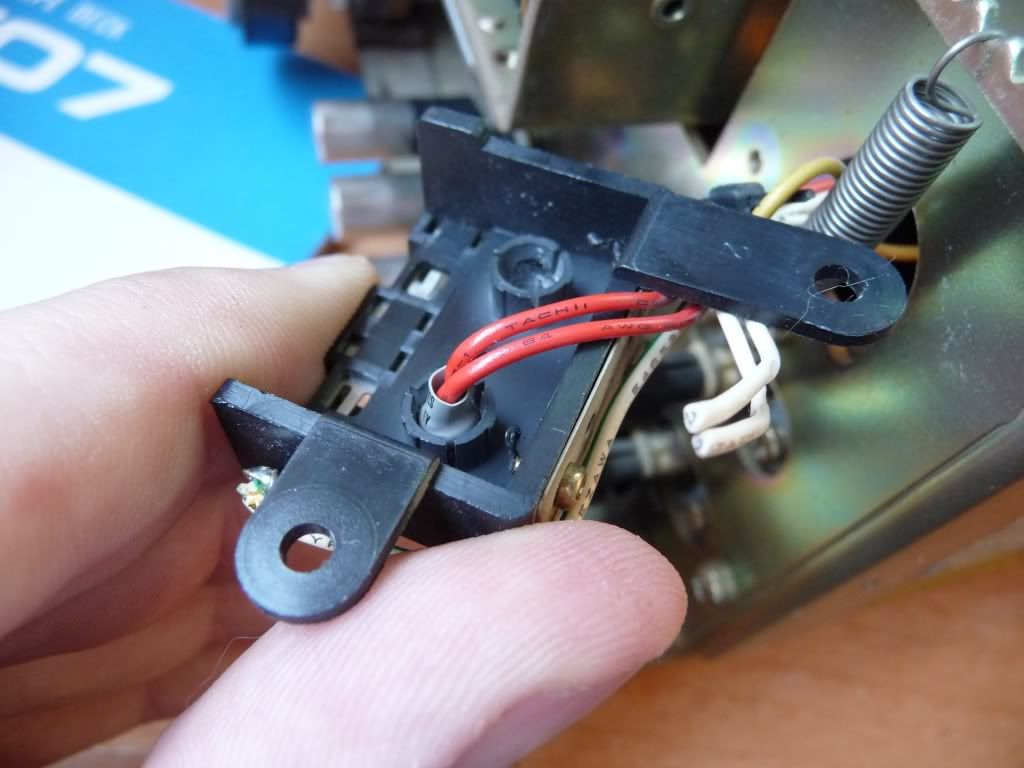
4- Solder the balast resistor to the cathode of the led (in the image is shown the first resistor that I tried). Use a simple tester to know which wire will go to the cathode and which one to the anode.

5- Put the led inside the original socket
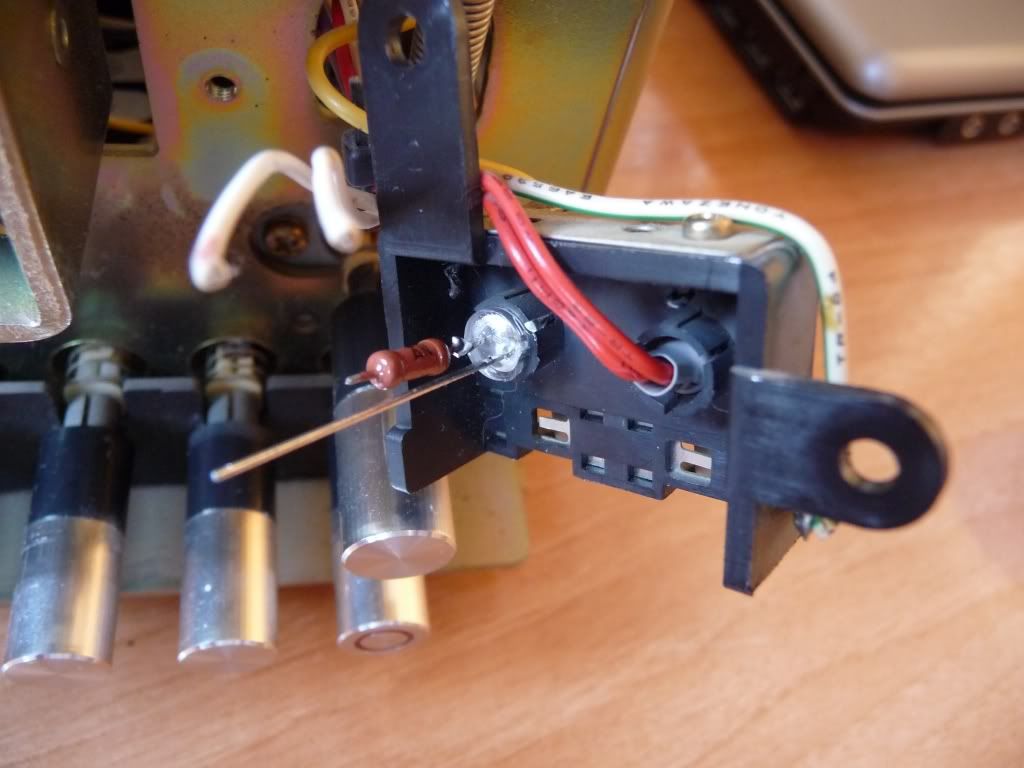
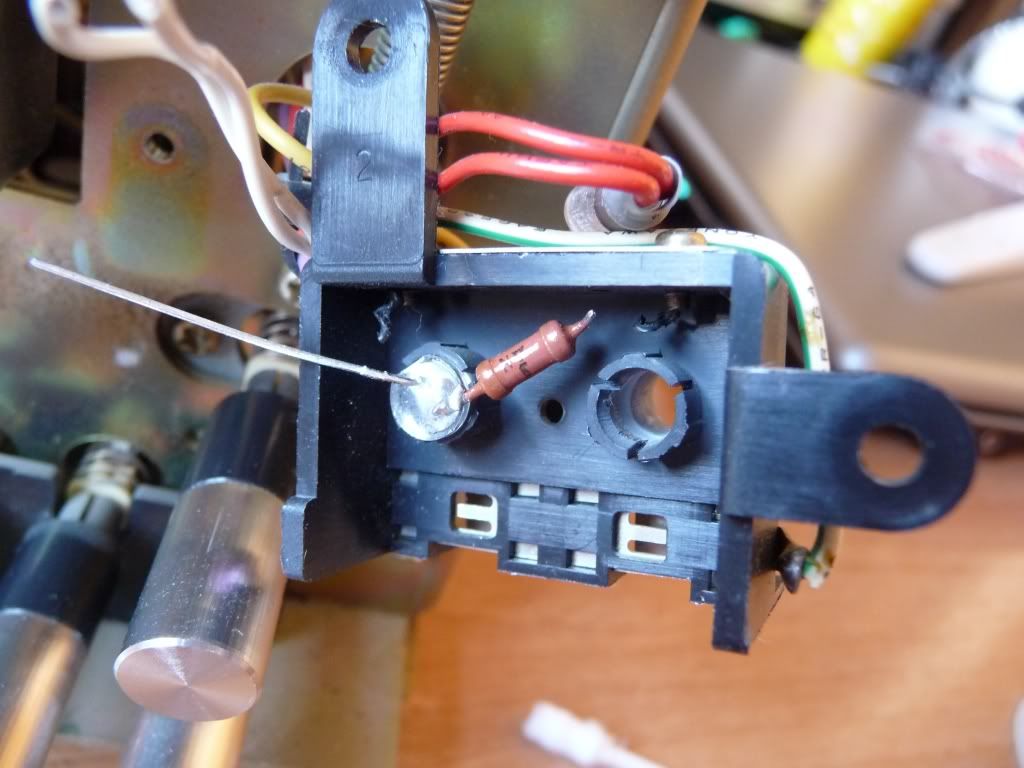
6- Solder the wires to the led and the balast resistor
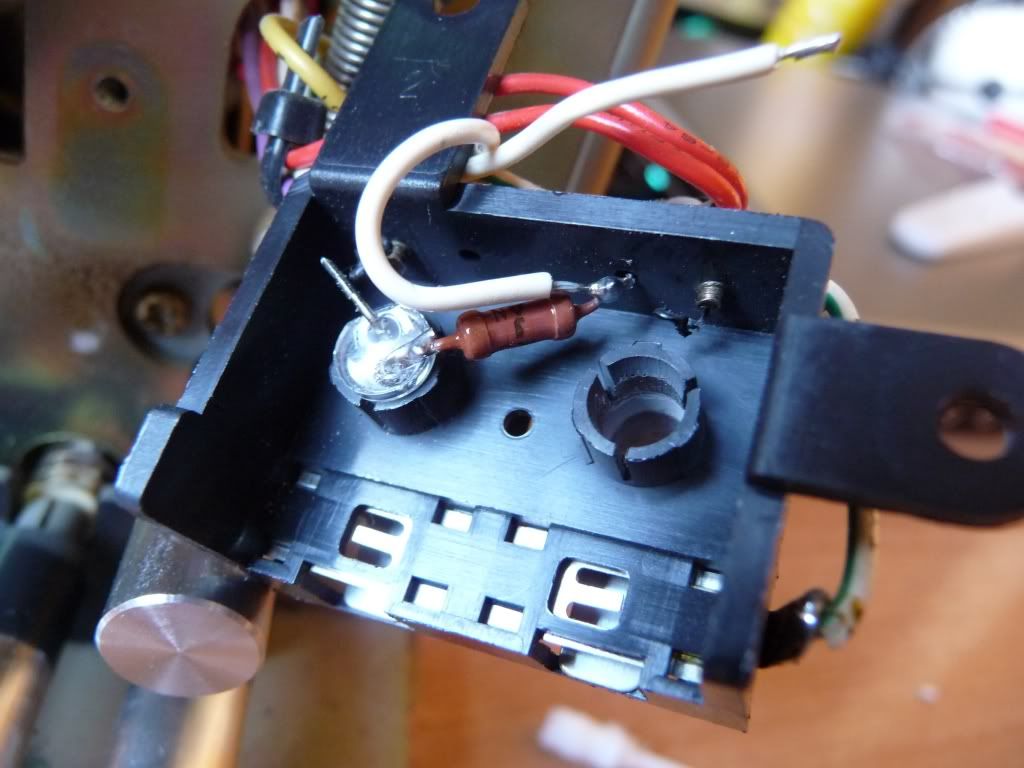
Here is another pic with the final balast resistor selected, 2.2 KOhms.
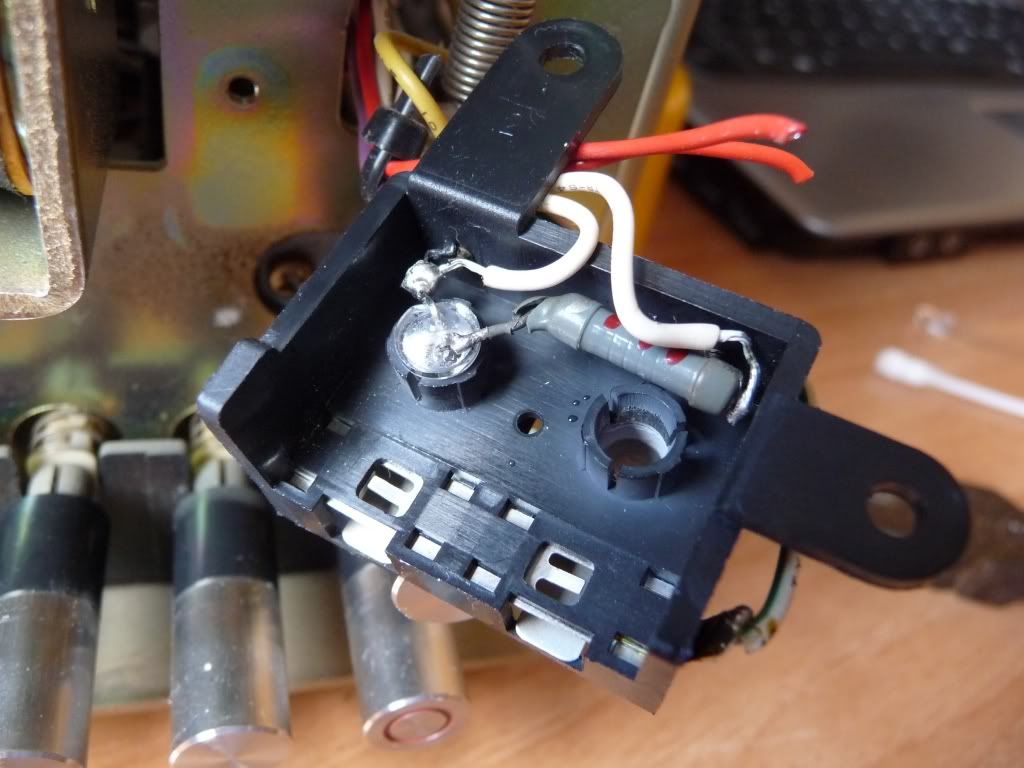
7- Solder the other direction led.
8- Test both direction leds.
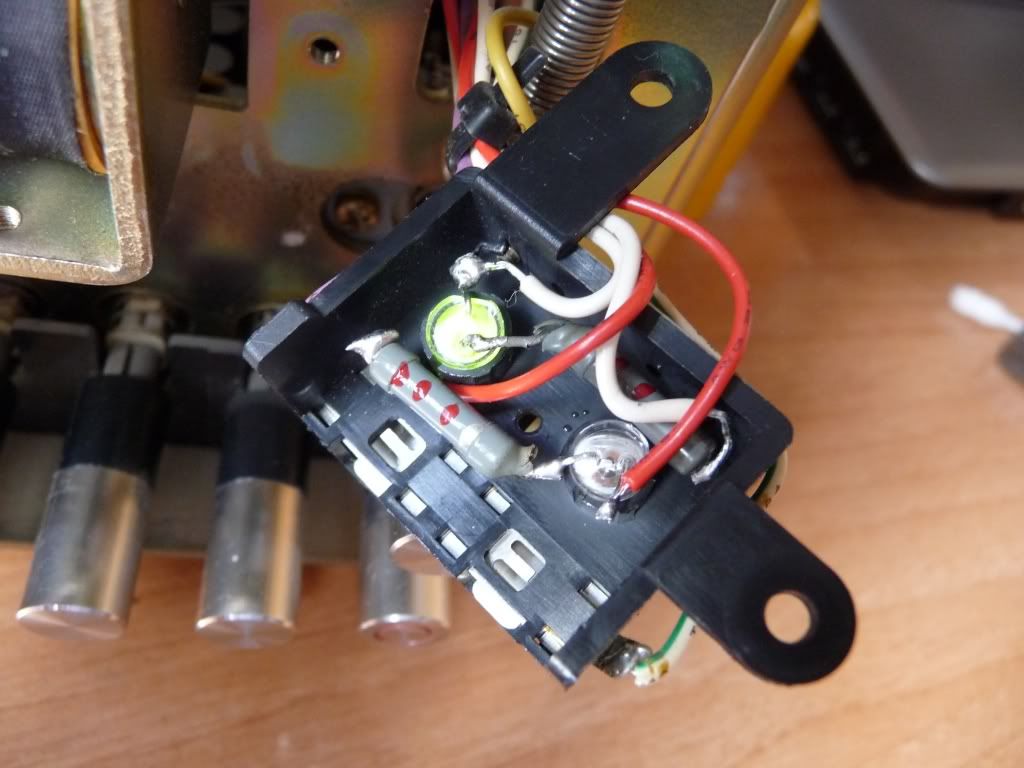
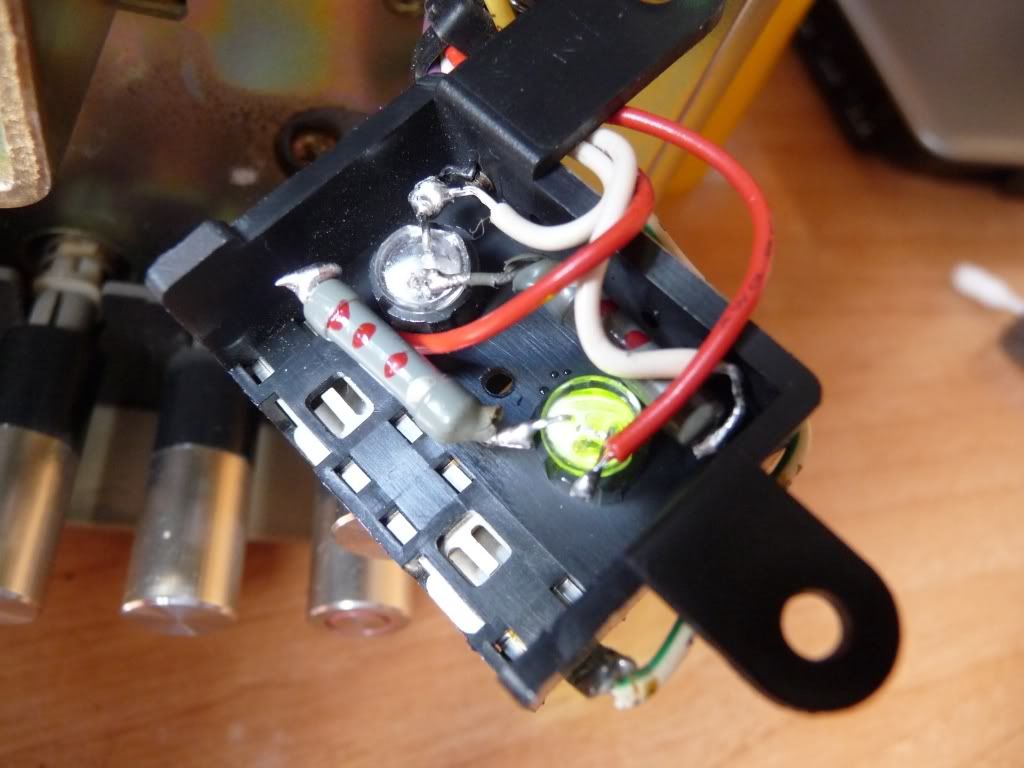
9- Put some electric tape in the chasis where will be hold the leds socket, to make a dielectric layer so that nothing wrong happens if some wire of the new leds touch the bottom part of the socket once it has been put in its original place
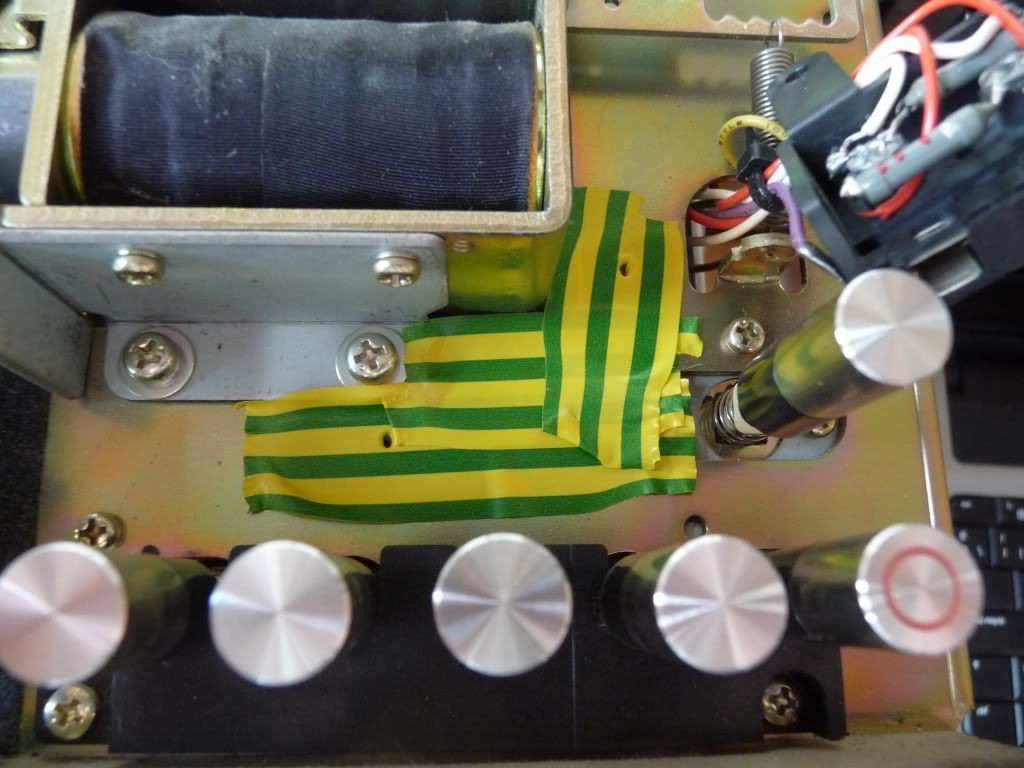
10- Put the leds socket in its place with the two philips screws and test the work
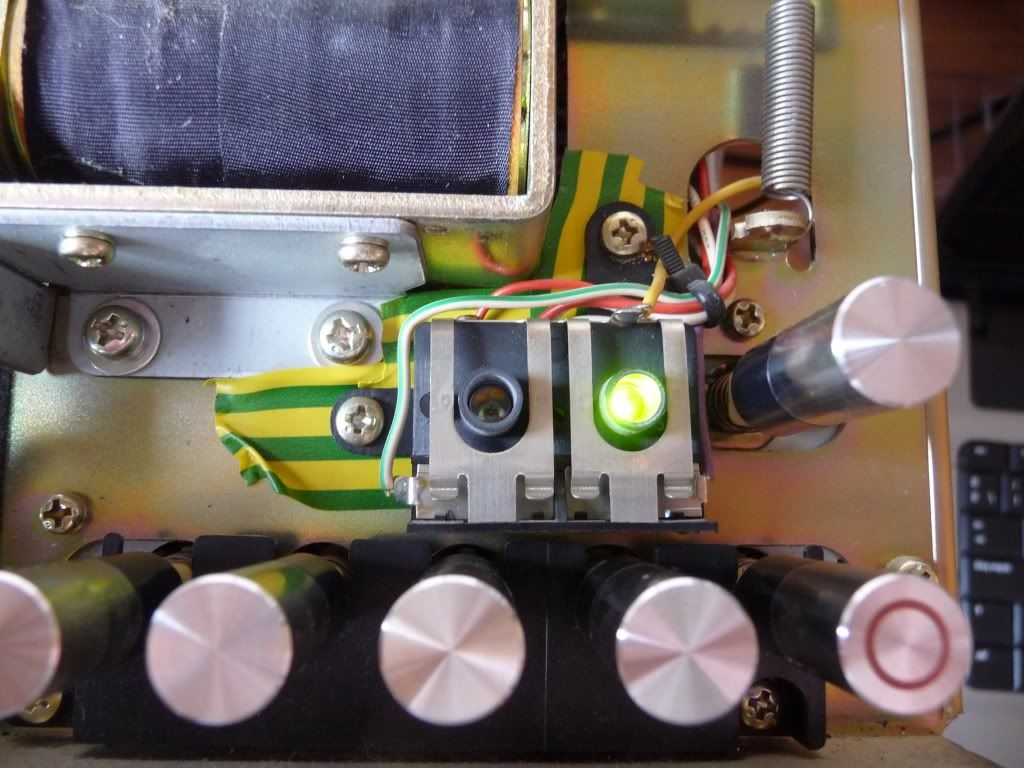

11- Put the front face and the cover in their original places.
Fortunatelly I had some leds left at home, so I began to replace both direction lamps with leds. The voltage to the lamps is about 26VDC, so a balast resistor is needed in serial with each led. I used 5mm width leds, that enter perfectly in the hold.
In a first time I tried a 1.3Kohms. 1/4 watt. After testing, it got too hot, so I tried a 2.2 Kohms. and with more wattage. Tested that first one led with it and all was working well.
Here is the procedure I followed to change the direction lamps with leds.
1- Remove the deck cover. Four philips screws in each side and three more in the upper.
2- Remove the front panel. Two philips screws and three more in the bottom. Remove the pots knobs of MIC and LINE controls. Also the pinch control knob. To remove the front panel now, both pinch roller must be pushed up manually and with care, pull the panel.
3- Both direction lamps are in a small black socket. To remove it, unscrew the two philips screws.

Each lamp is inside his hole and can be removered simply pulling the lamp from their wires.

4- Solder the balast resistor to the cathode of the led (in the image is shown the first resistor that I tried). Use a simple tester to know which wire will go to the cathode and which one to the anode.

5- Put the led inside the original socket


6- Solder the wires to the led and the balast resistor

Here is another pic with the final balast resistor selected, 2.2 KOhms.

7- Solder the other direction led.
8- Test both direction leds.


9- Put some electric tape in the chasis where will be hold the leds socket, to make a dielectric layer so that nothing wrong happens if some wire of the new leds touch the bottom part of the socket once it has been put in its original place

10- Put the leds socket in its place with the two philips screws and test the work


11- Put the front face and the cover in their original places.
MOV: Indiana Jones and the Kingdom of the Crystal Skull
Release date: May 2008
The action of the fourth Indiana Jones movie occurs in 1957, and in that year reel to reel decks were available and this film shows two different good examples.




Ampex 350
The reels seem to be Scotch or EMI type, but the NAB hub adapters maybe are ReVox.
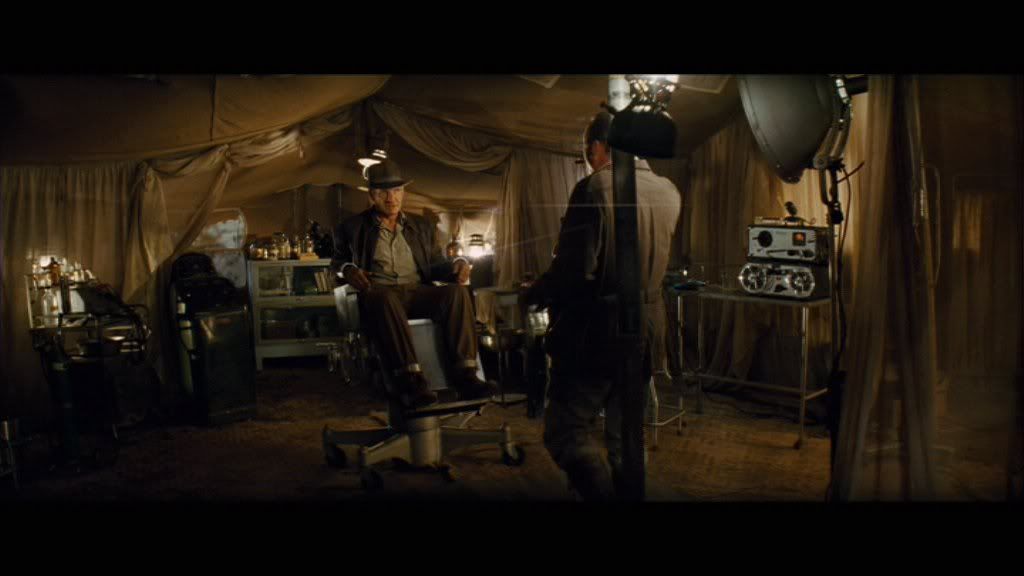
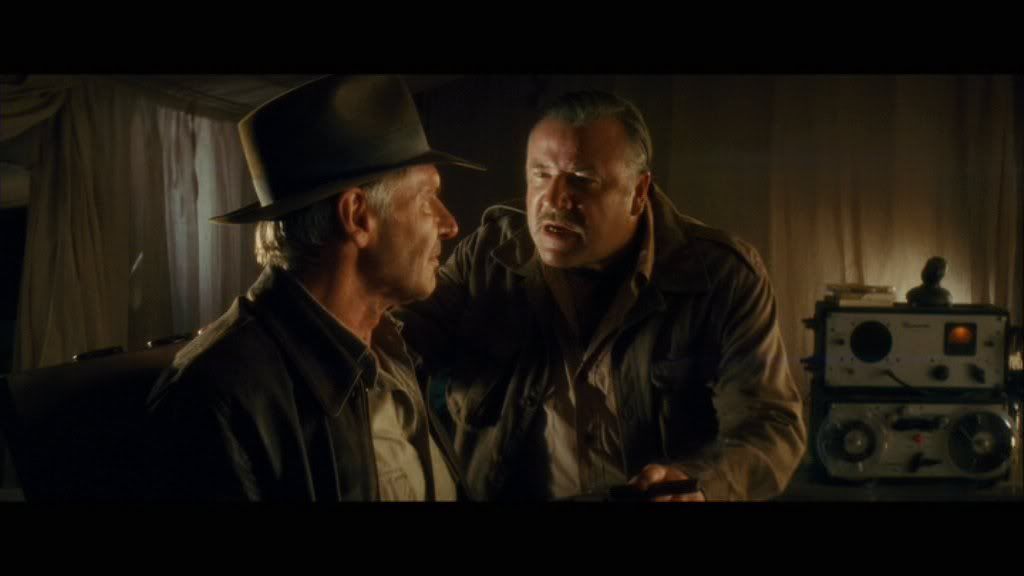

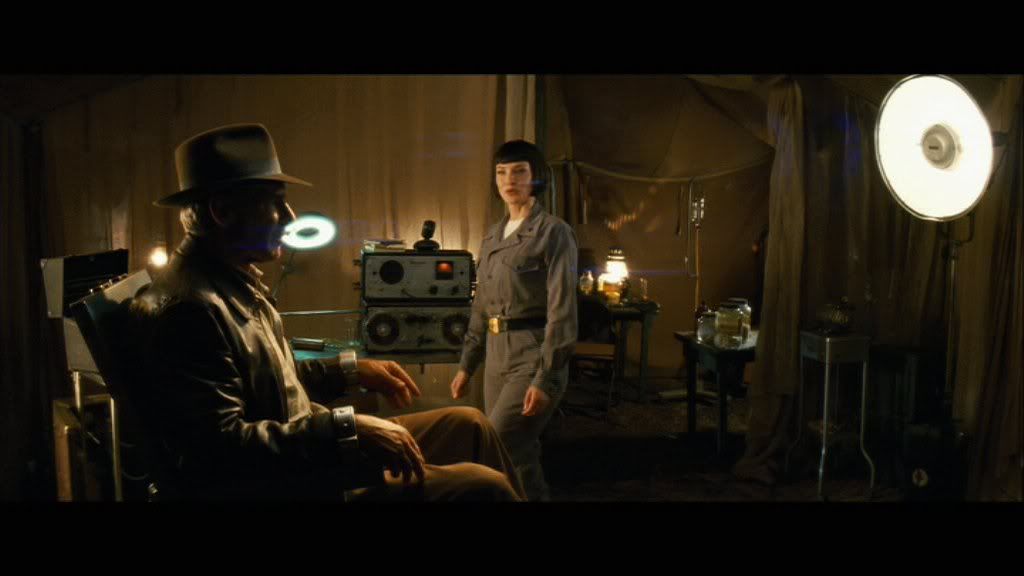
Magnecorder PT6-A transport + Magnecorder PT6-J portable record/playback electronics with amp and speaker
The machines are correctly dated. The Magnecorder is from 1947 and the Ampex is from 1953.
Internet Movie Database Link
The action of the fourth Indiana Jones movie occurs in 1957, and in that year reel to reel decks were available and this film shows two different good examples.


Ampex 350
The reels seem to be Scotch or EMI type, but the NAB hub adapters maybe are ReVox.


Magnecorder PT6-A transport + Magnecorder PT6-J portable record/playback electronics with amp and speaker
The machines are correctly dated. The Magnecorder is from 1947 and the Ampex is from 1953.
Internet Movie Database Link
Sunday, October 26, 2008
VID: Grundig TS-1000
Here is another video of the Grundig TS-1000 available in high quality playing back "Galactica OST" at 19 cms / 7.5 ips. The tape is a AGFA 468 and the reels are metal Scotch painted in blue. They look really cool.
This unit is modified, you can read more about it clicking here.
This unit is modified, you can read more about it clicking here.
VID: Tandberg TD 20A
Here is another video available in high quality (originally shot in 720P) showing the Tandberg TD 20A playing back "Badly Drawn Boy" at 19 cms / 7.5 ips, this time with ReVox black metal NAB hub adapters.
Saturday, October 18, 2008
DES: Akai R-7M 7" metal reel
Akai is probably the brand who made more different designs for their 7" metal reels. This one described here is the design with blue AKAI lettering.
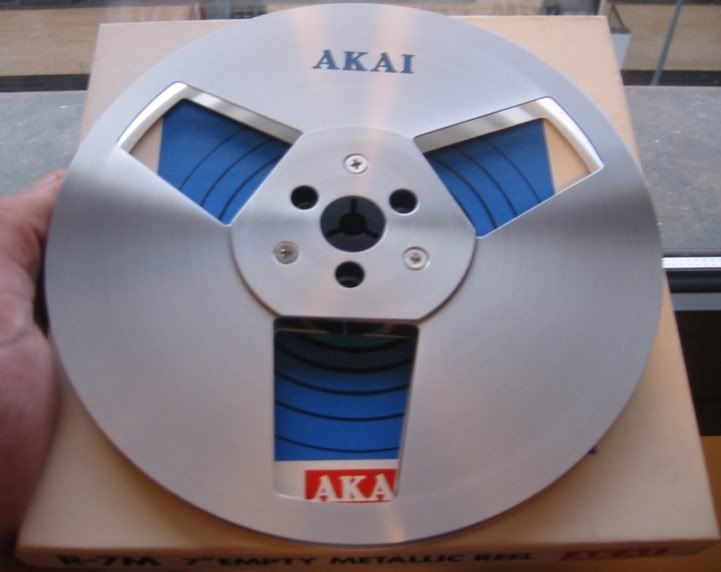
Akai R-7M reel.
It has three holes in-line with no slot. The reel is silver with the AKAI lettering in blue. The design is identical on both sides, no differences. It has three screws and three "blind slots".
The reel is very light with made by thin aluminium, but is consistent. The distance between the both flanges is a few just, however is rare that the tape touches any of them.
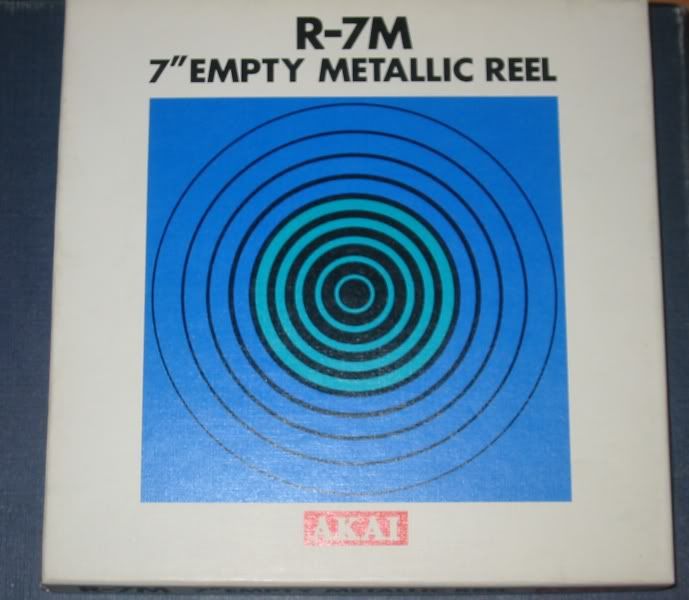
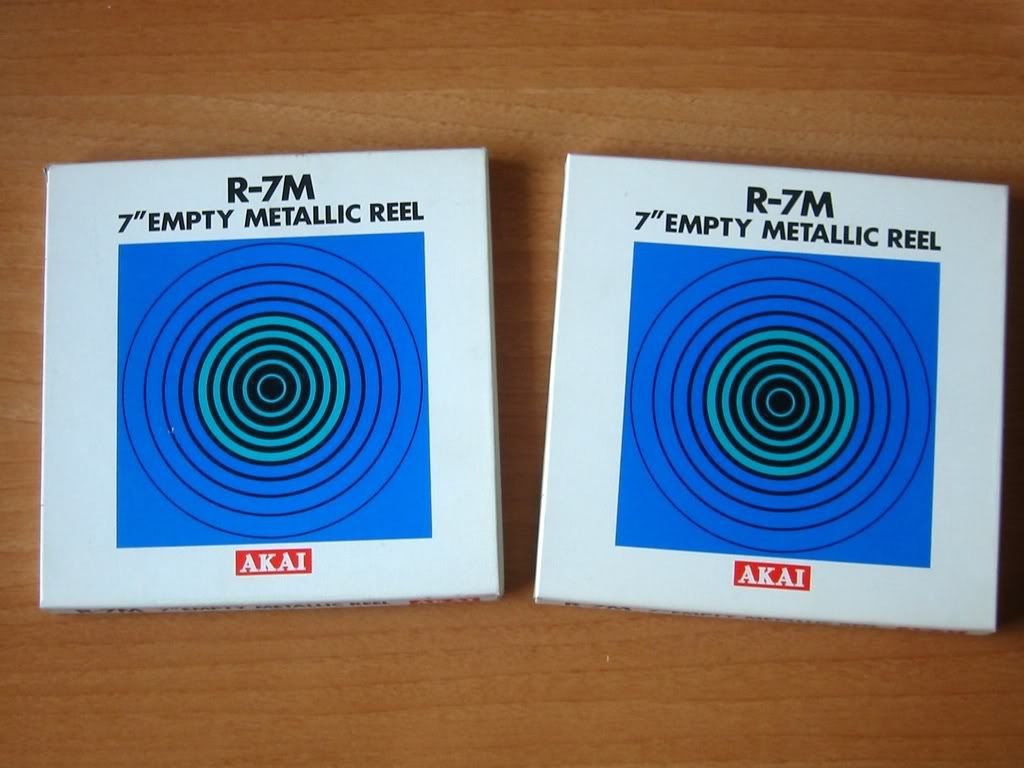
The original box.
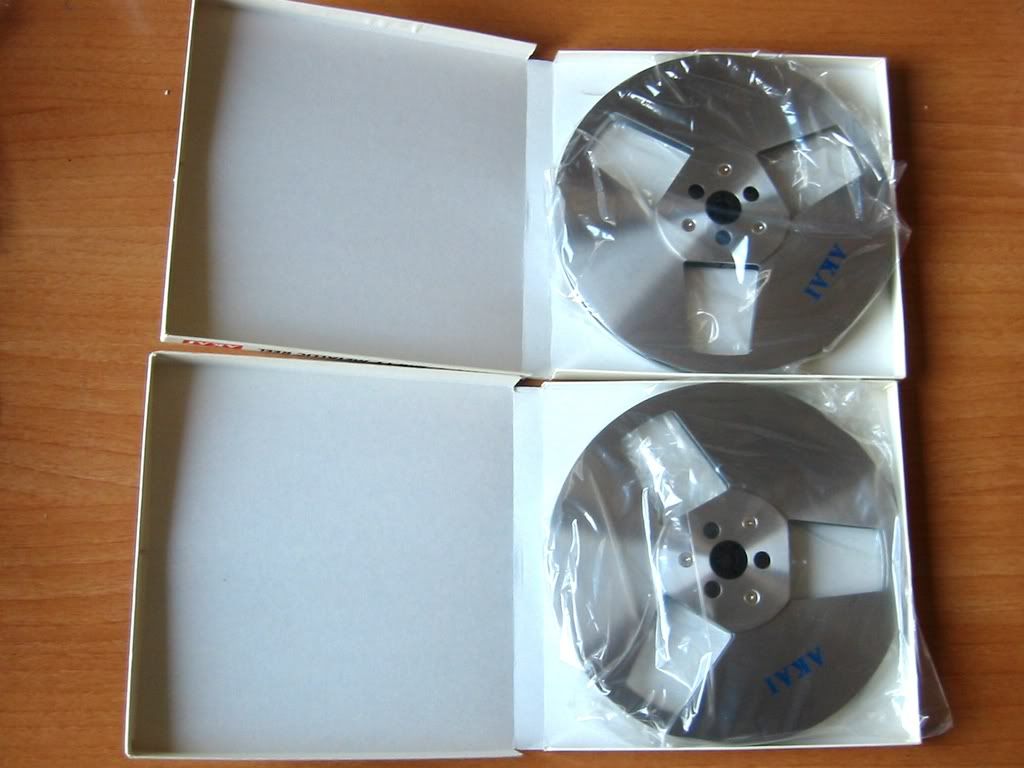
A pair of AKAI reels in their boxes.
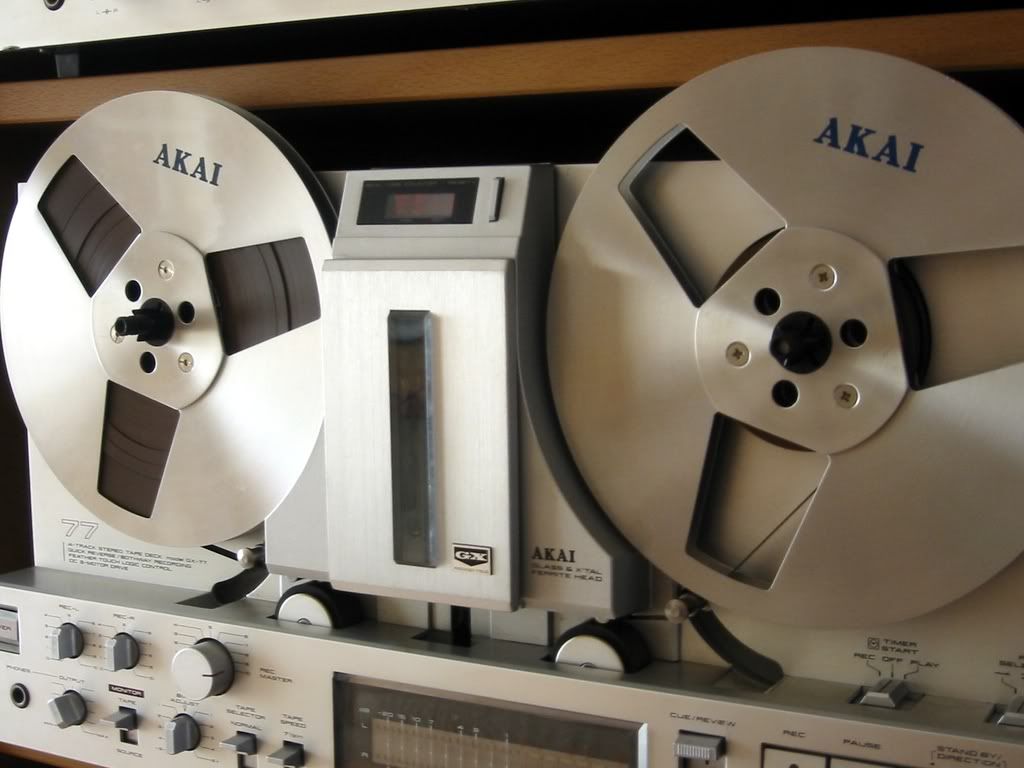
The reels in an Akai deck, the GX-77

Akai R-7M reel.
It has three holes in-line with no slot. The reel is silver with the AKAI lettering in blue. The design is identical on both sides, no differences. It has three screws and three "blind slots".
The reel is very light with made by thin aluminium, but is consistent. The distance between the both flanges is a few just, however is rare that the tape touches any of them.


The original box.

A pair of AKAI reels in their boxes.

The reels in an Akai deck, the GX-77
Saturday, October 4, 2008
DES / VID: Tandberg TD 20A
This was the top of the line reel to reel deck made by Tandberg and can handle up to 10.5" reels . It was sold in two versions: 4 tracks and 2 tracks.
The 4 tracks version came with the standard domestic speeds: 9.5 cms / 3.75 ips and 19 cms / 7.5 ips, while the 2 tracks version came with the professional speeds: 19 cms / 7.5 ips and 38 cms / 15 ips.
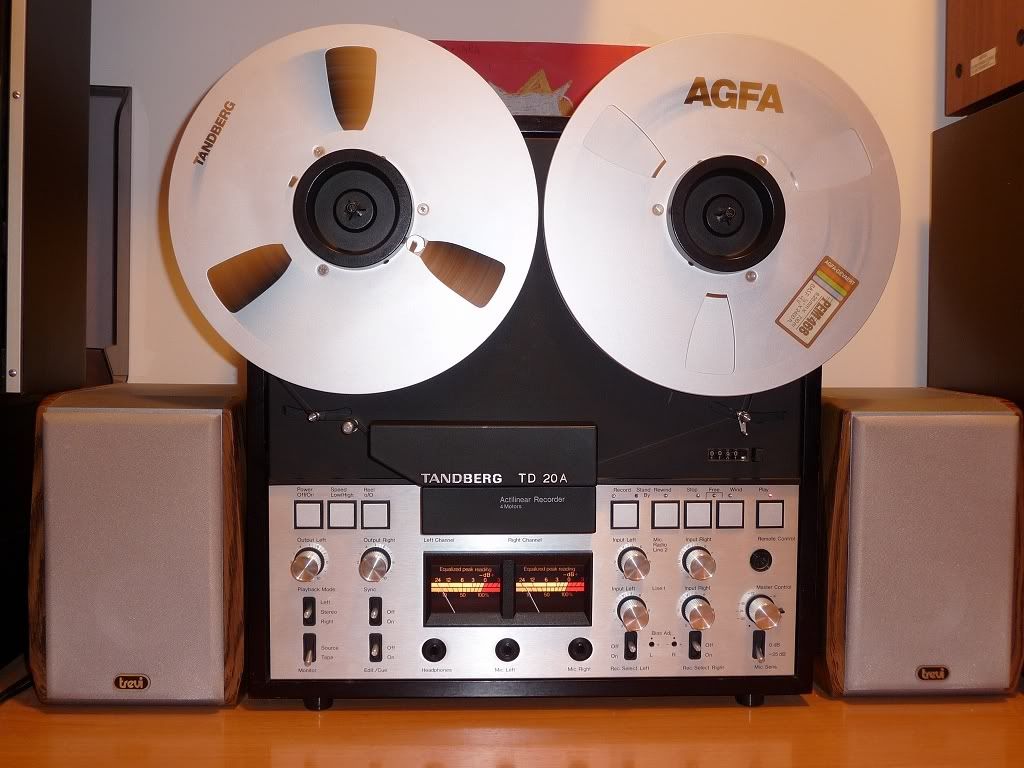
Instead of the typical 3 motor design, this deck has 4 motors: one per each reel, one for the capstan and the last one for pinch roller engage. I think this deck was the only one made with this feature instead of the most typical design by solenoid.
But there are more odd things. For example, this deck doesn't have a PAUSE button. It's rare, but I think the explanation is the system used to engage the pinch roller.
Other odd is that isn't neccesary to press the record and play buttons at the same time, it's only needed to press the record button and the deck goes into the recording mode if at least one of the record switches are selected. When a record switch is on, the "stand by" led lights.
All transport functions are led lighted, even the "stop" and all leds are red.
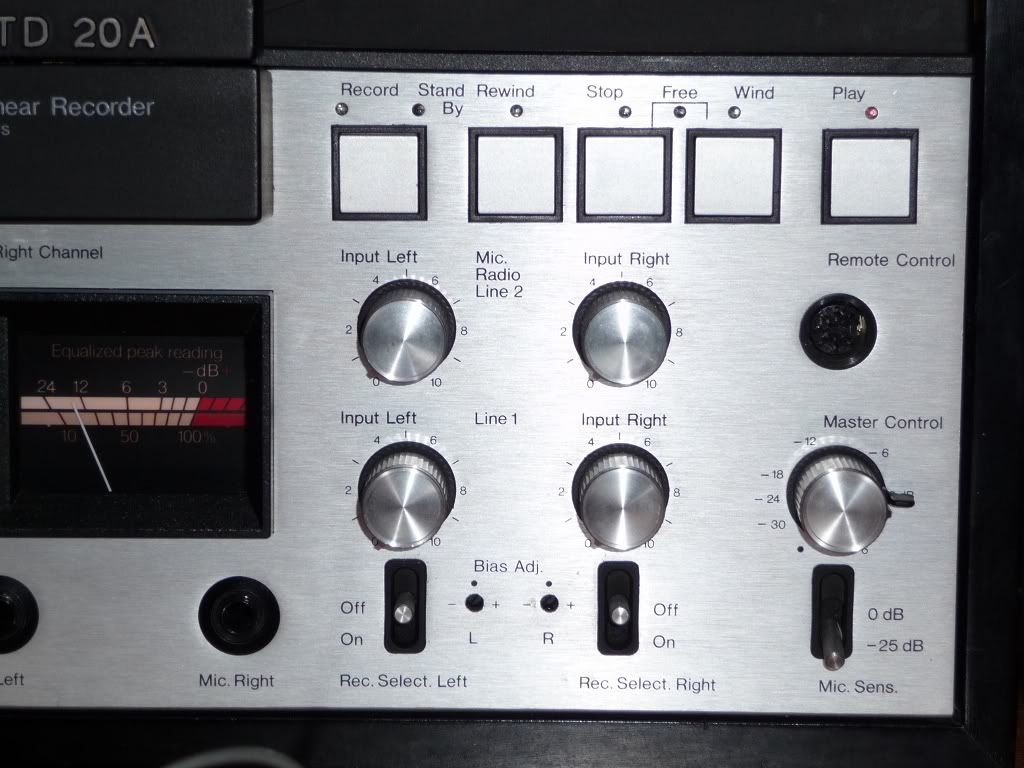
There's one feature that it's curious: the "free" mode. When "stop" and "wind" buttons are pressed at the same time, the led with the "free" function lights. In that mode the brakes are released and both reels can be manipulated by hand without any friction.
If the "edit / cue" switch is on, the sound can be heared while the reels are manipulated by hand. To end the free mode, just press "stop" and the deck will tight the tape.
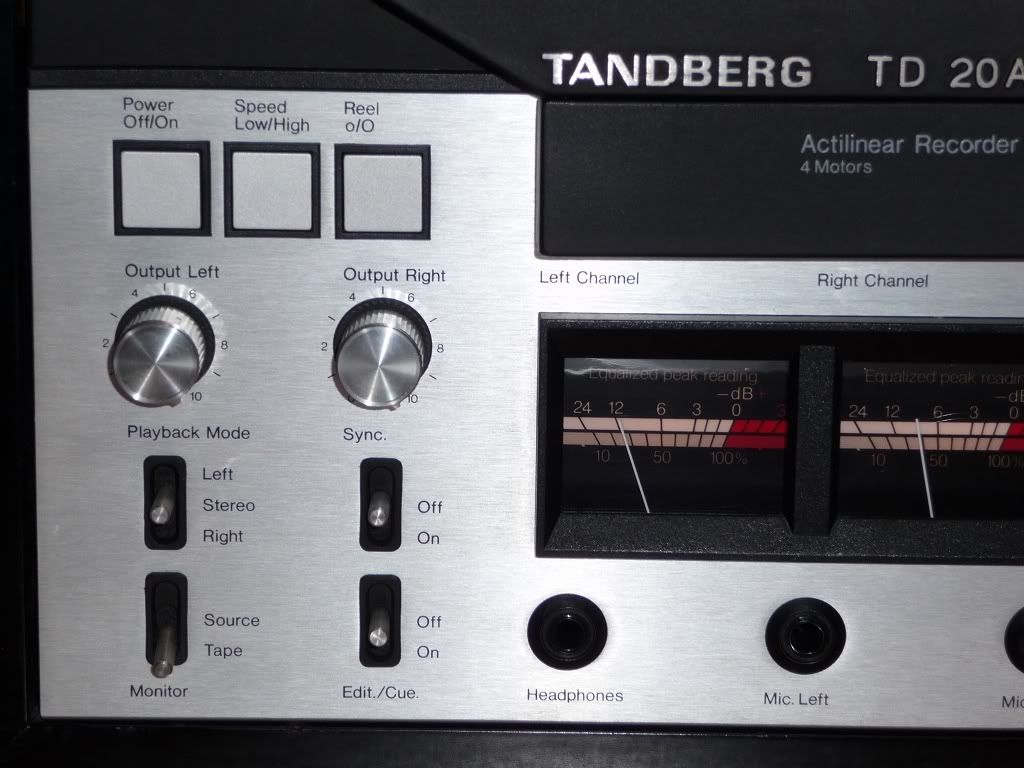
Bias adjustment can be done individually per each channel with two pots that are in the front face of the deck and there are individual pots for the input signals per channel (line 1 and line 2 / mic), mic attenuator and output signal.
And here is the Tandberg TD 20A in action:
The 4 tracks version came with the standard domestic speeds: 9.5 cms / 3.75 ips and 19 cms / 7.5 ips, while the 2 tracks version came with the professional speeds: 19 cms / 7.5 ips and 38 cms / 15 ips.

Instead of the typical 3 motor design, this deck has 4 motors: one per each reel, one for the capstan and the last one for pinch roller engage. I think this deck was the only one made with this feature instead of the most typical design by solenoid.
But there are more odd things. For example, this deck doesn't have a PAUSE button. It's rare, but I think the explanation is the system used to engage the pinch roller.
Other odd is that isn't neccesary to press the record and play buttons at the same time, it's only needed to press the record button and the deck goes into the recording mode if at least one of the record switches are selected. When a record switch is on, the "stand by" led lights.
All transport functions are led lighted, even the "stop" and all leds are red.

There's one feature that it's curious: the "free" mode. When "stop" and "wind" buttons are pressed at the same time, the led with the "free" function lights. In that mode the brakes are released and both reels can be manipulated by hand without any friction.
If the "edit / cue" switch is on, the sound can be heared while the reels are manipulated by hand. To end the free mode, just press "stop" and the deck will tight the tape.

Bias adjustment can be done individually per each channel with two pots that are in the front face of the deck and there are individual pots for the input signals per channel (line 1 and line 2 / mic), mic attenuator and output signal.
And here is the Tandberg TD 20A in action:
But, how is the 4th motor? how does it work exactly?. Look:
Monday, September 29, 2008
VID: Teac X-2000R inside
As I explained in the previous entry, I had to fix a tension arm problem with my Teac X-2000R, so after fixing it, I shot this video showing some inside views of the deck and how the capstan belt changes its position depending on which play direction is selected.
This happens because the capstan wheels have two parts, one with a diameter bigger than the other, so that when the forward direction is selected, the belt accomodates the position where the right capstan wheel spins a little faster than the left one, and the opposite, when the reverse direction is selected, the left capstan wheel spins a little faster than the right capstan wheel.
This happens because the capstan wheels have two parts, one with a diameter bigger than the other, so that when the forward direction is selected, the belt accomodates the position where the right capstan wheel spins a little faster than the left one, and the opposite, when the reverse direction is selected, the left capstan wheel spins a little faster than the right capstan wheel.
VID / REP: Teac X-2000R tension arms
Although my Teac X-2000R was almost mint, from the first moment the tension arms fluctuated when it was in play mode, both forward or reverse.
I swapped both tension arms guide rollers but the problem persisted.
I swapped both tension arms guide rollers but the problem persisted.
I opened the deck trying to figure out which was the problem. The auto-tension system is basically the same as the one found in the Grundig TS-1000. Each tension arm has a small plate attached in the inside and passes near a photodetector so that when the tension arm is in the lower position, the motor power goes up, and when the arm goes to a higher position, the tension applied to the motor goes down.
Here is a video shot from the inside of the machine:
Here is a video shot from the inside of the machine:
I tried to adjust the position of the photodetectors and even the trimmers that adjust the tension, but no luck, the problem still happening.
The tension arm axis is a screw that has springs. I realized that when I manipulated the screw, the height position of the tension arm varied. I adjusted this screw with the machine in play mode with a tape threaded so that I can watch the results in real time. I minimal adjustement was needed to watch the tension arm stops its oscillation.
In appearance, this was a rare failure, because most times whis happen is caused by old motors and/or poor lubricated rollers and arms, but in this case, both rollers are in perfect shape and the motors too.
Here is another video with the final result after the adjustement:
Saturday, September 27, 2008
VID: Pioneer RT-1020H spinning at 15 ips
This deck eat tape very fast when runs at 38 cms / 15 ips, but spins really fast when it's used 7" reels.
In the video can be also watched all the buttons and lettering in detail.
Sunday, September 21, 2008
VID / TIP: Trashing a sticky tape
If you have bought a tape and resulted to be sticky, or a tape that you already had and is completly useless for you once you have made a copy of the content, maybe you have asked yourself how to remove the tape but keeping the reel for future use as take up reel or to be fulled with other tape.
The first step is to be sure that your tape has the sticky shed syndrome. I usually do this method:
Once is threaded by the tape path, press FF and if you note than after one minute, it goes slow, press RWD. If the tape travels very slow or even can't travel, then is a sticky tape:
Well, now how to do with the tape to trash it fast and keep the reel without having as a result a never ending spaguetti tape incident:
I use a NAB hub without flanges, just the hub, but to get at least the correct aligment position as if were with a flange, I use a CD as a separator.
Easy and fast.
Easy and fast.
VID: Pioneer RT-909 inside
Today I've had to open the deck to make some mechanical adjustements, so I shot this video where is shown both external and internal parts of it in detail together with all transport functions from both points of view.
Saturday, September 20, 2008
VID: Pioneer RT-707 playing Iron Maiden
Just another video showing a Pioneer RT-707spinning. Since I'm doing the videos with a photo camera and sometimes with a webcam, the sound is really bad, but at this time I'm unable to copy from the video camera to the computer, so until better news, both video and audio quality won't be as good as in the first videos, but I think the top quality is not the goal when the videos will be watched in YouTube.
This time with two ReVox 7" metal reels, one in blue and one in gold, spinning at 19cm/s - 7.5 ips that contains close shots so that every detail can be watched.
I wish you like and enjoy it.
This time with two ReVox 7" metal reels, one in blue and one in gold, spinning at 19cm/s - 7.5 ips that contains close shots so that every detail can be watched.
I wish you like and enjoy it.
Friday, September 19, 2008
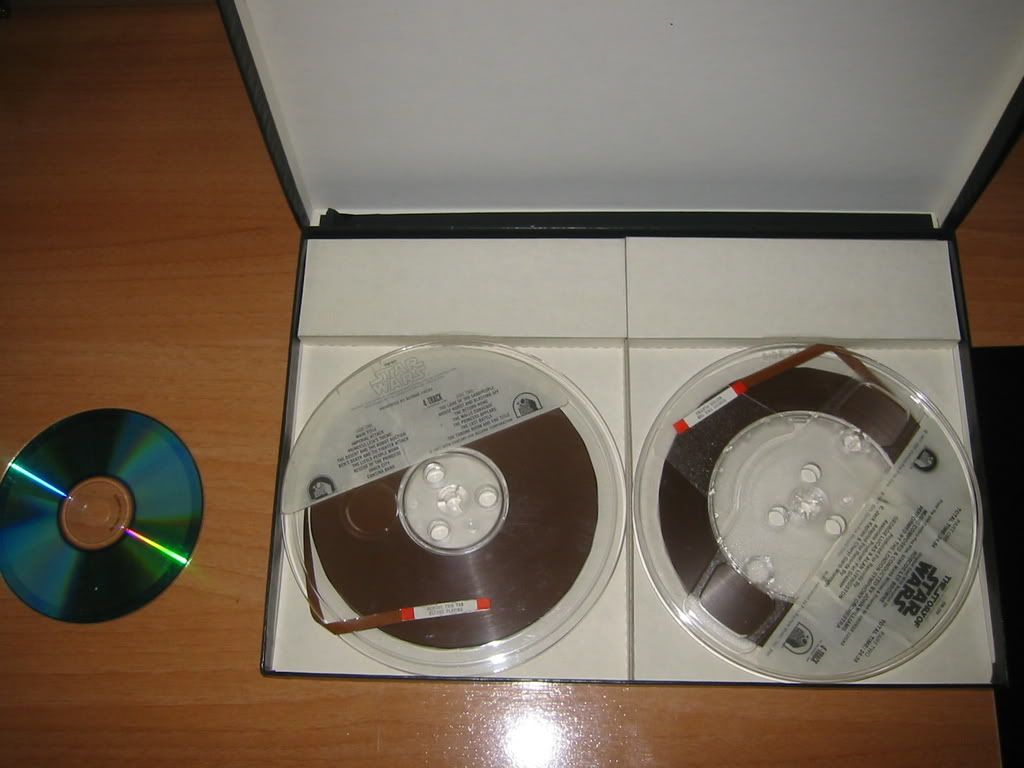
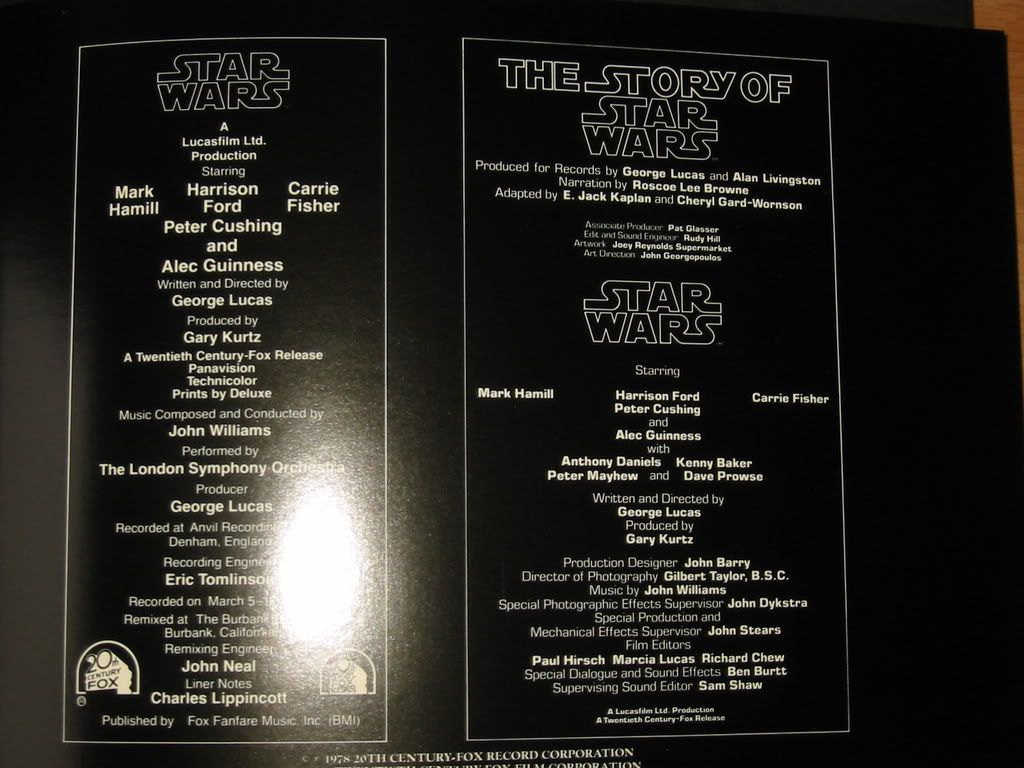
DES: The story of Star Wars and OST
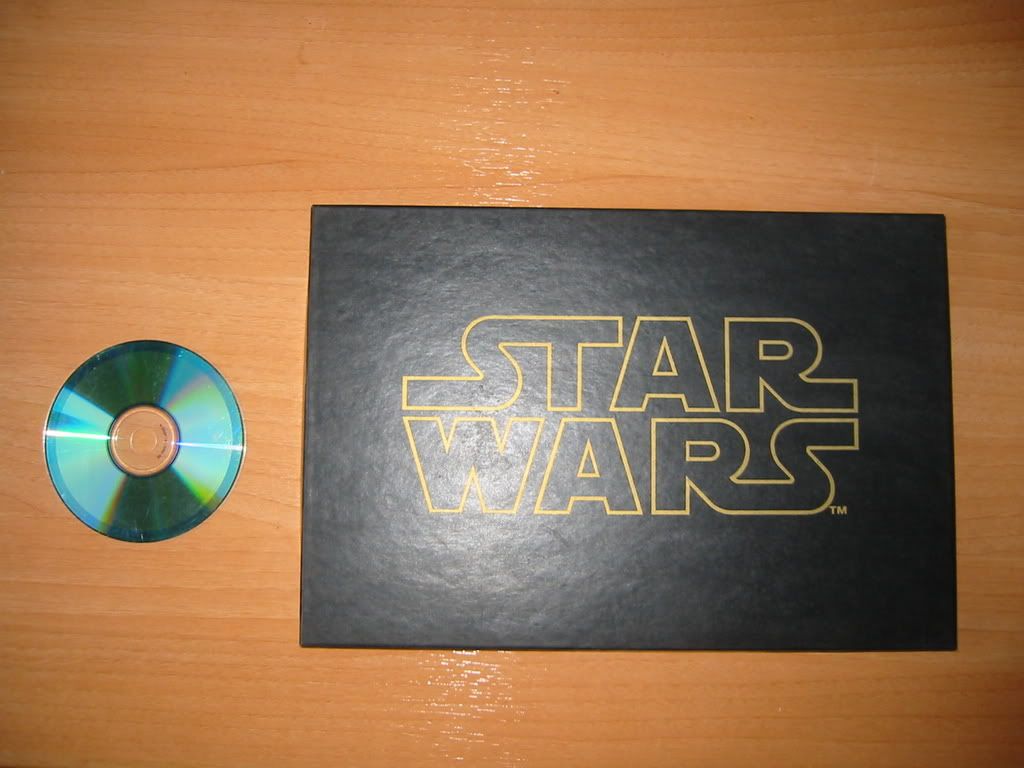
This a good collector's item that I found sometime ago in mint state, never used.
I think that this boxset was only released in open reel tape at the end of 70's, just after the theatrical release of the movie. Separatelly was released in vinyl too.
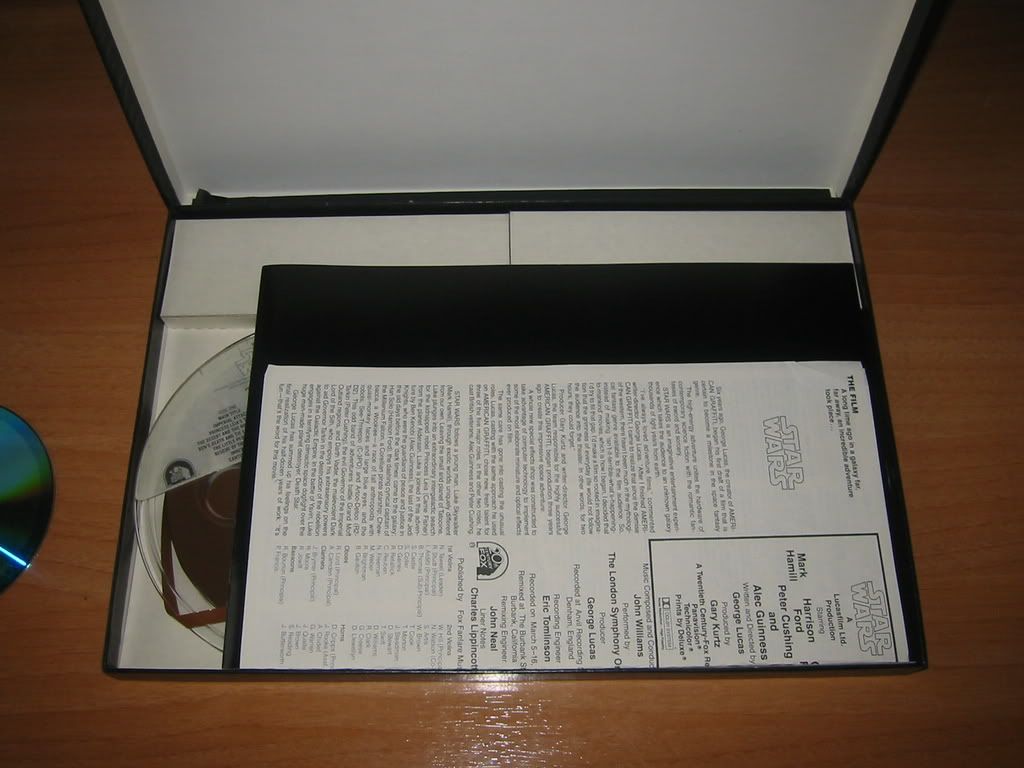
There are two tapes recorded at 7.5 ips - 19 cm/s in 4 track stereo configuration, plus a complete list of all components of the orchesta and an album with high quality pictures of the movie.
The sound quality is good in both tapes. The first tape contains the original soundtrack composed by John Williams and the second tape contains the story of Star Wars, that is basically the sound of the original movie, but with a narrator that conduces the story. The total running time of the story is about 50 minutes.
Here are some pics of this collector's item:








Subscribe to:
Comments (Atom)

