
Today I was working a Pioneer RT-707, putting some grease in the capstan motor and adjusting the fly wheel when both direction lamps burned. It's rare that both lamps burn at the same time, but I think that this happened because they were in their last hours, and after manipulated the deck, putting it up, down... etc, finally the filaments broke.
Fortunatelly I had some leds left at home, so I began to replace both direction lamps with leds. The voltage to the lamps is about 26VDC, so a balast resistor is needed in serial with each led. I used 5mm width leds, that enter perfectly in the hold.
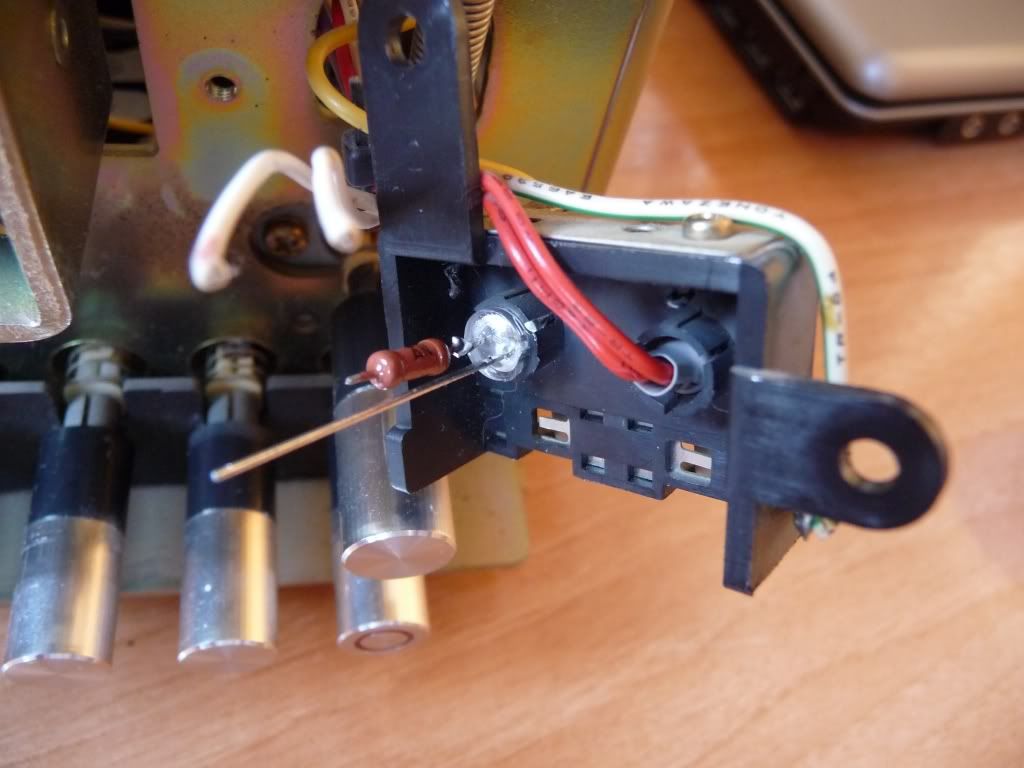
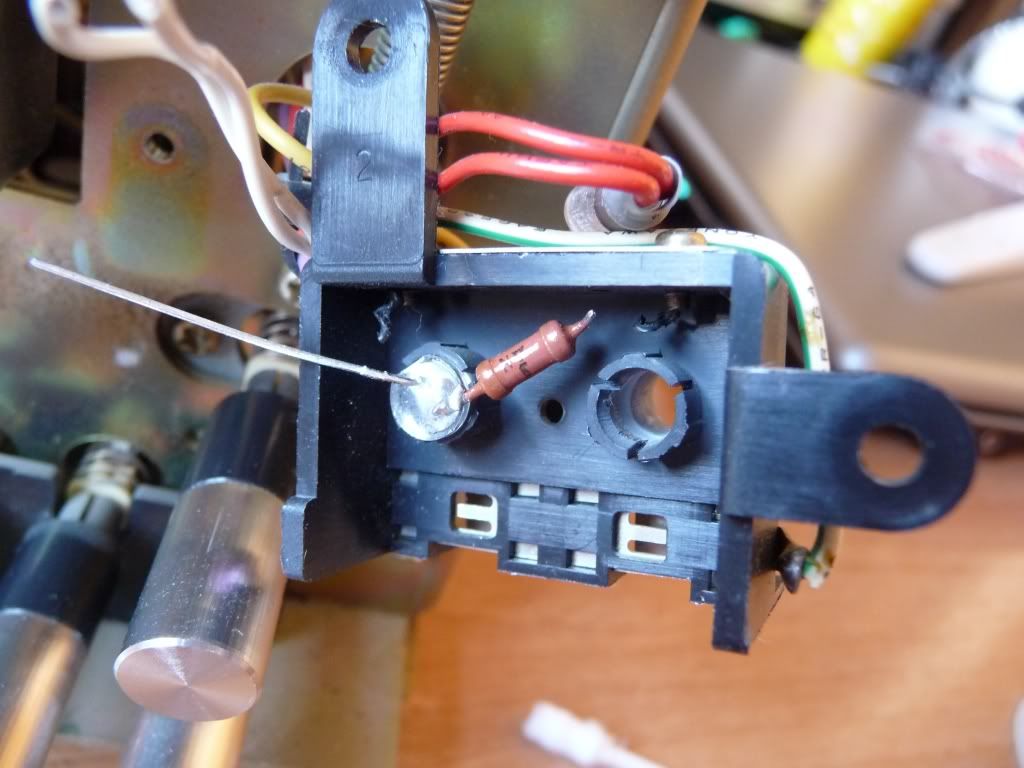
In a first time I tried a 1.3Kohms. 1/4 watt. After testing, it got too hot, so I tried a 2.2 Kohms. and with more wattage. Tested that first one led with it and all was working well.
Here is the procedure I followed to change the direction lamps with leds.
1- Remove the deck cover. Four philips screws in each side and three more in the upper.
2- Remove the front panel. Two philips screws and three more in the bottom. Remove the pots knobs of MIC and LINE controls. Also the pinch control knob. To remove the front panel now, both pinch roller must be pushed up manually and with care, pull the panel.
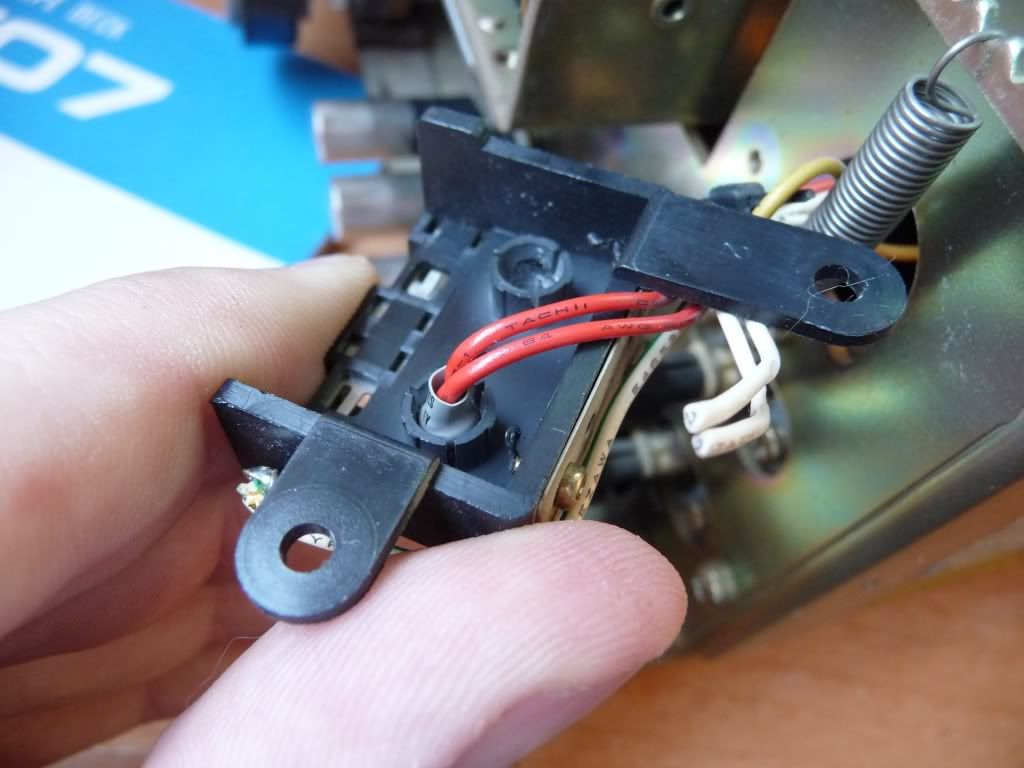
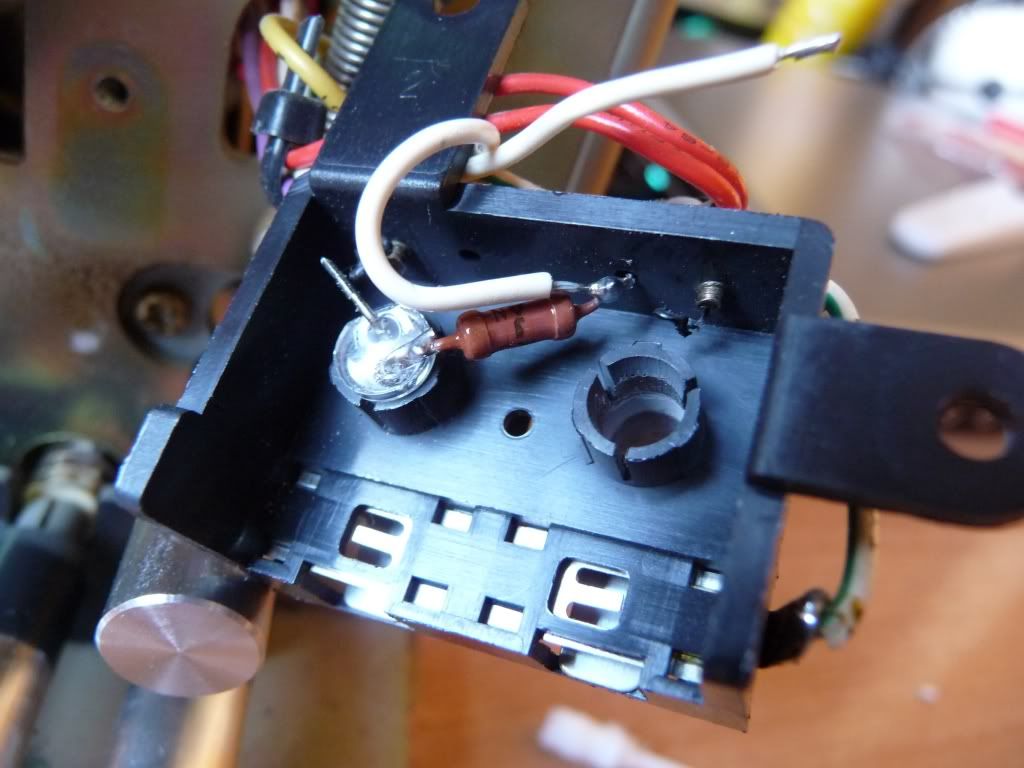
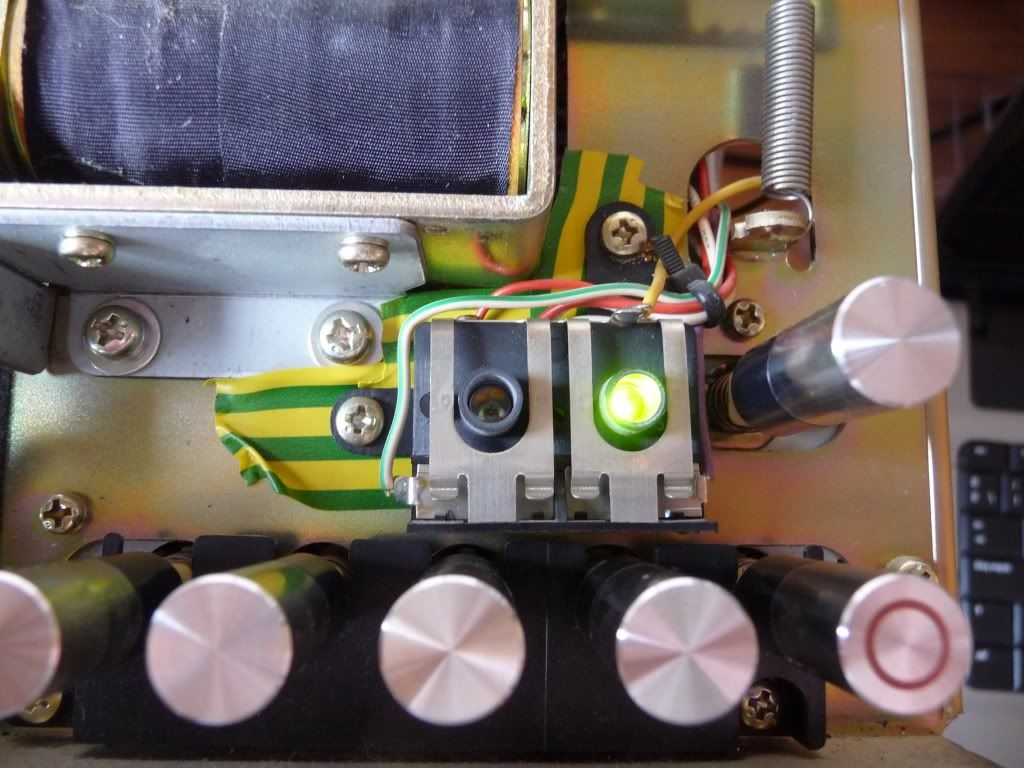
3- Both direction lamps are in a small black socket. To remove it, unscrew the two philips screws.
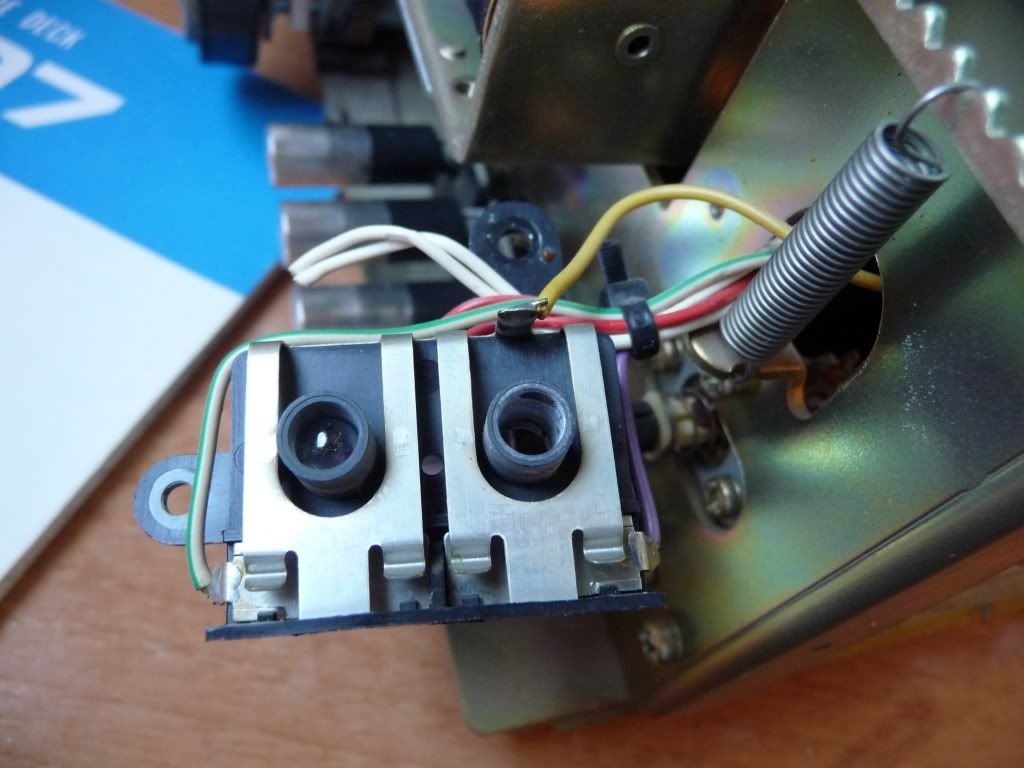
Each lamp is inside his hole and can be removered simply pulling the lamp from their wires.
4- Solder the balast resistor to the cathode of the led (in the image is shown the first resistor that I tried). Use a simple tester to know which wire will go to the cathode and which one to the anode.

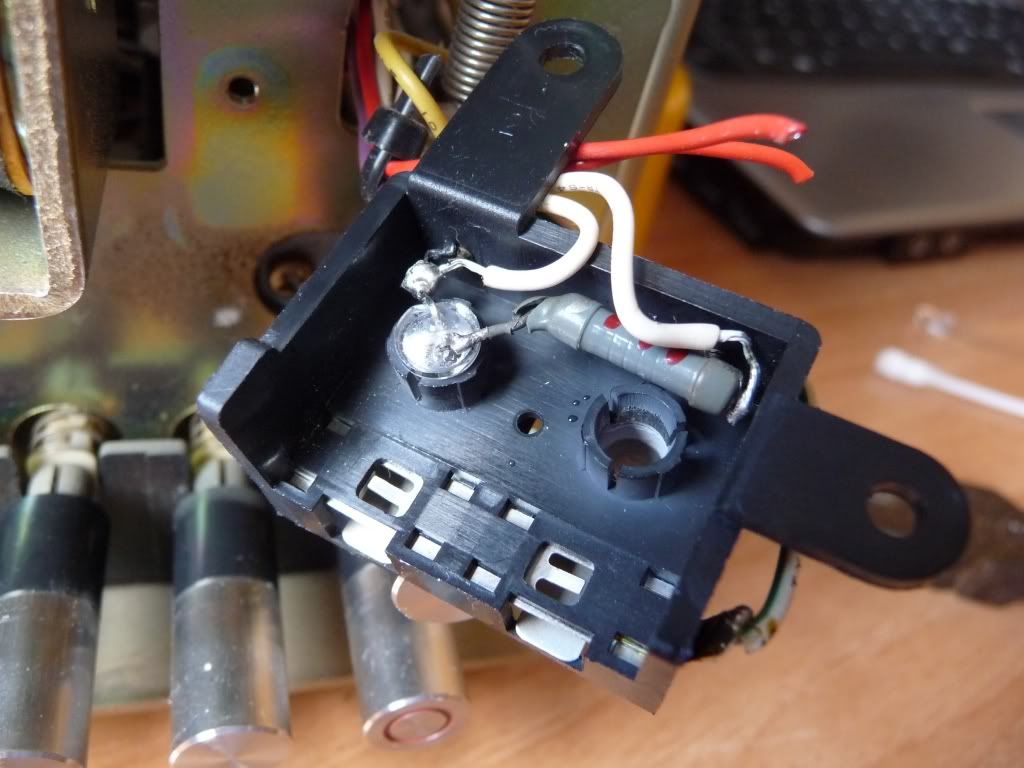
5- Put the led inside the original socket
6- Solder the wires to the led and the balast resistor
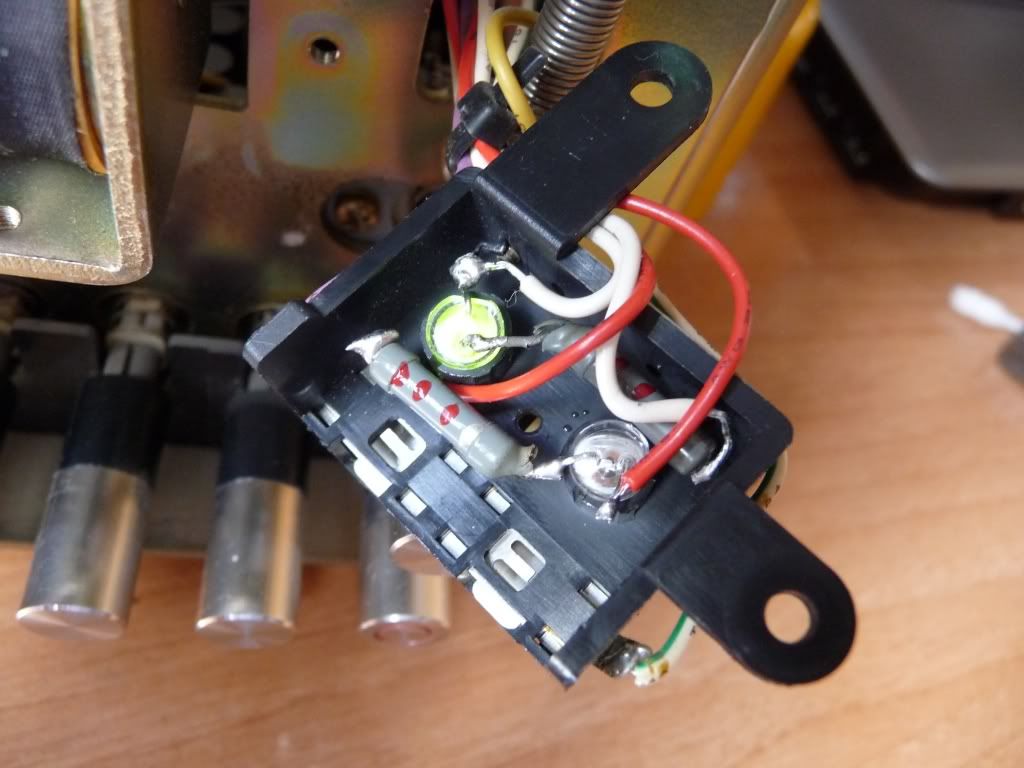
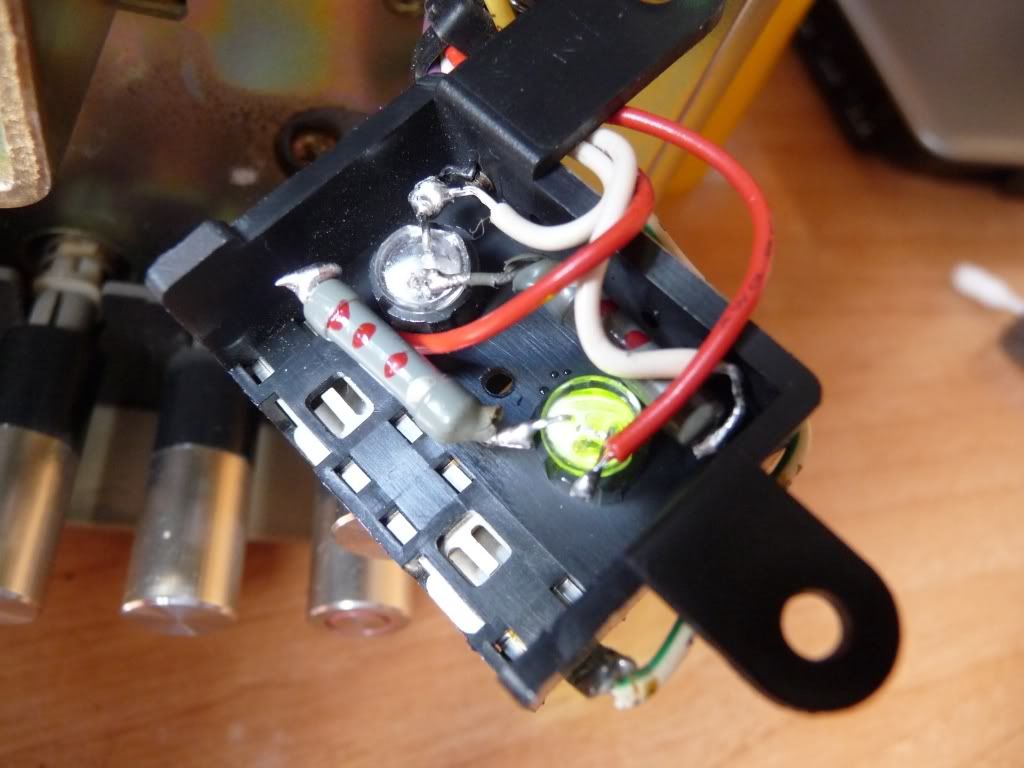
Here is another pic with the final balast resistor selected, 2.2 KOhms.
7- Solder the other direction led.
8- Test both direction leds.
9- Put some electric tape in the chasis where will be hold the leds socket, to make a dielectric layer so that nothing wrong happens if some wire of the new leds touch the bottom part of the socket once it has been put in its original place

10- Put the leds socket in its place with the two philips screws and test the work

11- Put the front face and the cover in their original places.
Fortunatelly I had some leds left at home, so I began to replace both direction lamps with leds. The voltage to the lamps is about 26VDC, so a balast resistor is needed in serial with each led. I used 5mm width leds, that enter perfectly in the hold.
In a first time I tried a 1.3Kohms. 1/4 watt. After testing, it got too hot, so I tried a 2.2 Kohms. and with more wattage. Tested that first one led with it and all was working well.
Here is the procedure I followed to change the direction lamps with leds.
1- Remove the deck cover. Four philips screws in each side and three more in the upper.
2- Remove the front panel. Two philips screws and three more in the bottom. Remove the pots knobs of MIC and LINE controls. Also the pinch control knob. To remove the front panel now, both pinch roller must be pushed up manually and with care, pull the panel.
3- Both direction lamps are in a small black socket. To remove it, unscrew the two philips screws.
Each lamp is inside his hole and can be removered simply pulling the lamp from their wires.
4- Solder the balast resistor to the cathode of the led (in the image is shown the first resistor that I tried). Use a simple tester to know which wire will go to the cathode and which one to the anode.
5- Put the led inside the original socket
6- Solder the wires to the led and the balast resistor
Here is another pic with the final balast resistor selected, 2.2 KOhms.
7- Solder the other direction led.
8- Test both direction leds.
9- Put some electric tape in the chasis where will be hold the leds socket, to make a dielectric layer so that nothing wrong happens if some wire of the new leds touch the bottom part of the socket once it has been put in its original place
10- Put the leds socket in its place with the two philips screws and test the work
11- Put the front face and the cover in their original places.


2 comments:
Hola Pedro,
Me gustaria preguntarte si conoces/recomiendas algun sitio en Barcelona o alrededores, donde pueda llevar mi RT-707 para que le cambien las luces de los VU meters asi como las de dirección pues están fundidas.
Gracias por tu tiempo, execelente página!
What a terrific detail thread on the Pioneer RT-707's Direction/Indicator lamps. Yes, these do go out at a period of time which really does not affect the performance of the unit but is annoying in the sense that only of will work or none at all and that is not how the unit was made to function. Again excellent post and very informative.
Post a Comment