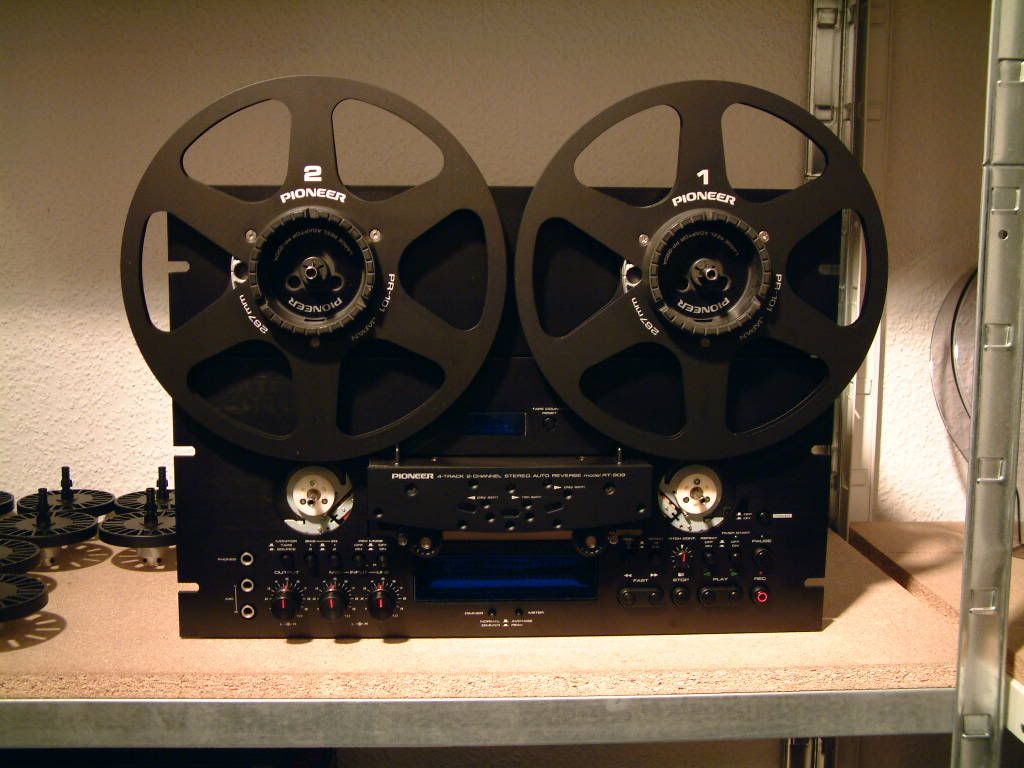
After thirty years is possible than the pinch roller mechanism of the Pioneer RT-909 gets sticky. It happened too to other machines that I own because the grease used in the mechanic pieces becomes gummy.
To solve this problem is needed to do some work inside the machine, isn't too complicated, but are needed some tools to open class E circlips (retaining rings / E-clips).
First of all I removed eight philips screws, four per side, to remove the black cover. The top front panel has three philips screws in the top of it. Once they are removed, the top front panel can be removed pulling it from the top against you.
To remove the lower front panel is better to place the deck horizontally. Take care with the back panel because there are the input and output cinch connectors and the voltage selector (not present in all units, only in global models).
With the deck horizontally I removed three philips screws in the bottom and another three in the top of the panel. Next step is to remove the buttons covers from output volume, mic input, line input and pinch control. Is better to remove also the pinch rollers taking care not to lose all washers and screws. Before remove the bottom panel, look carefully how is mounted in the bottom part.

Both front panels and the head block removed .
With both front panels removed I went on with the head cover. Is needed an allen screwdriver to remove the two biggest screws in the head cover (they are black). I think that now all the head block can be moved just pulling it carefully, however I prefered to remove also the screws that fix the bottom thin piece that is linked to the head block.
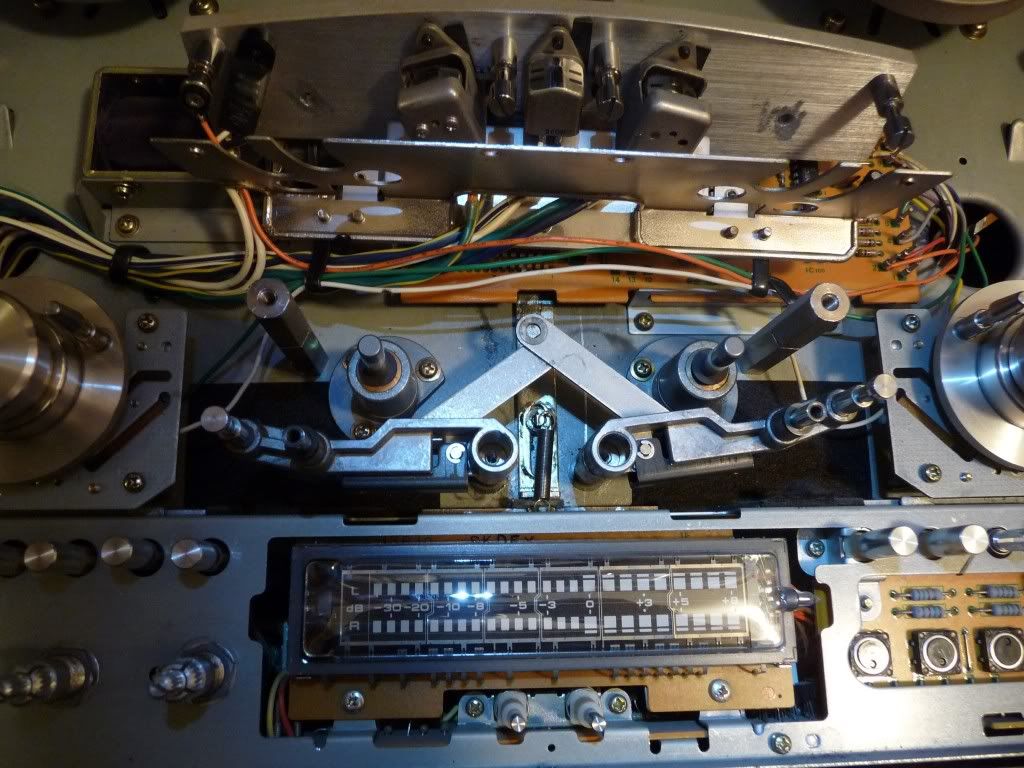
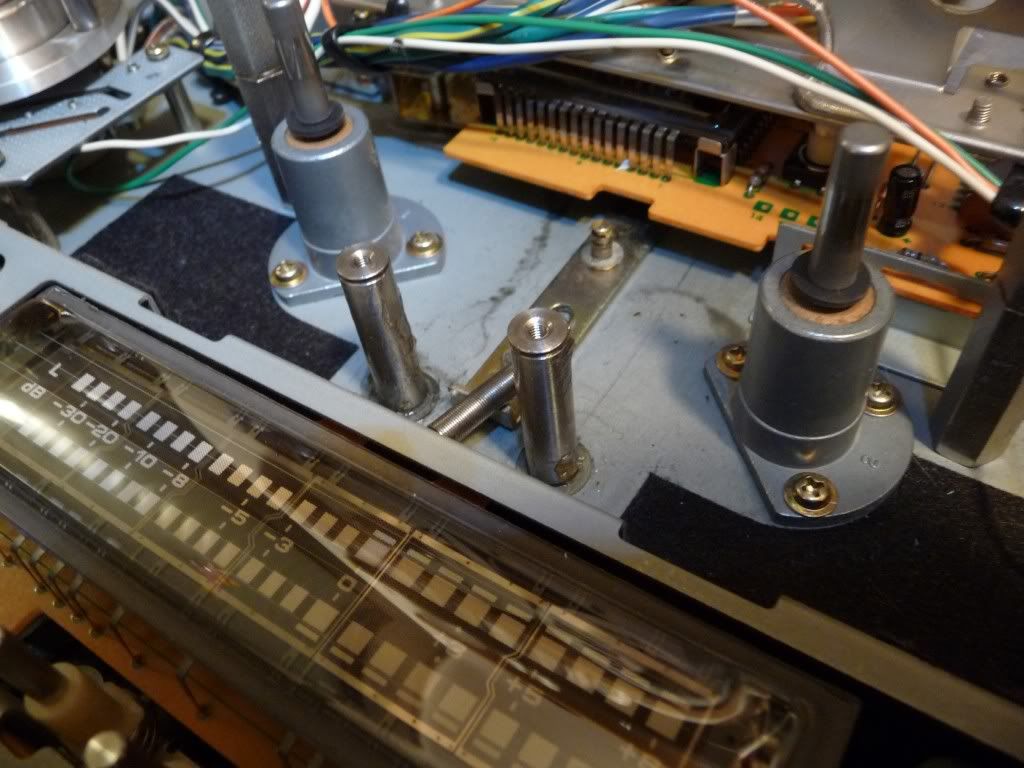
The pieces that are directly responsible of the problem are the two arms where are mounted the pinch rollers. Both arms come together in an unique branch that is attached by a thin deck to the pinch roller solenoid. Each of those arms is mounted over a cylindrical axis and the grease between the axis and the pinch roller arm is solidified.
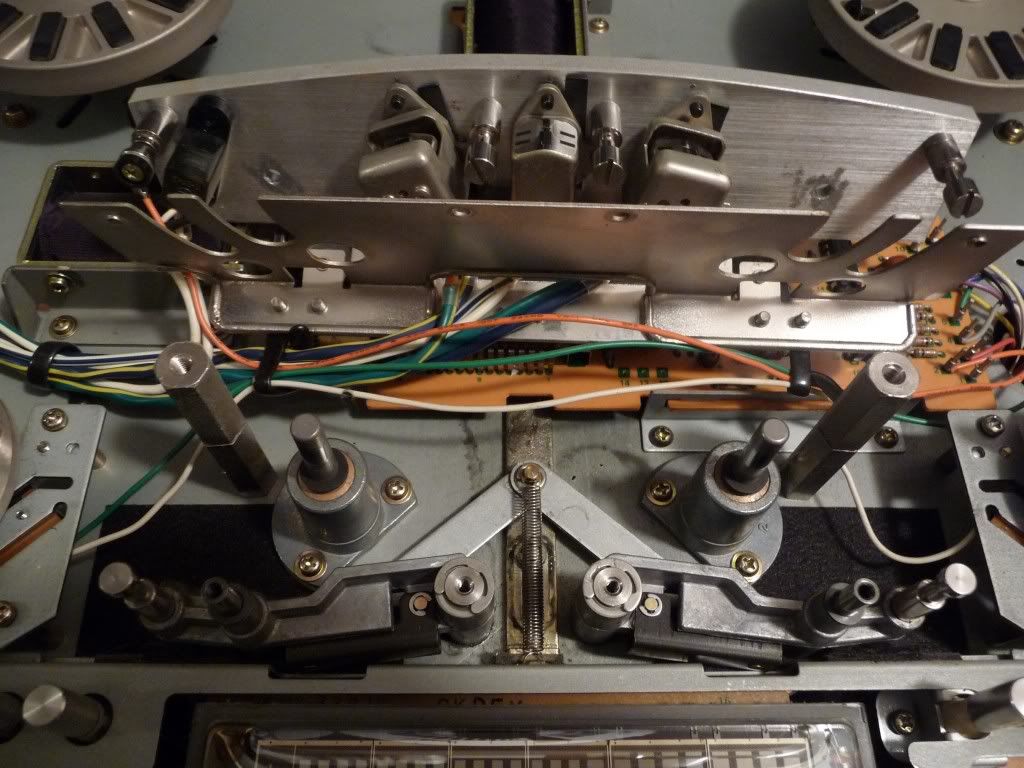
The two pinch roller arms that must be removed to clean them.
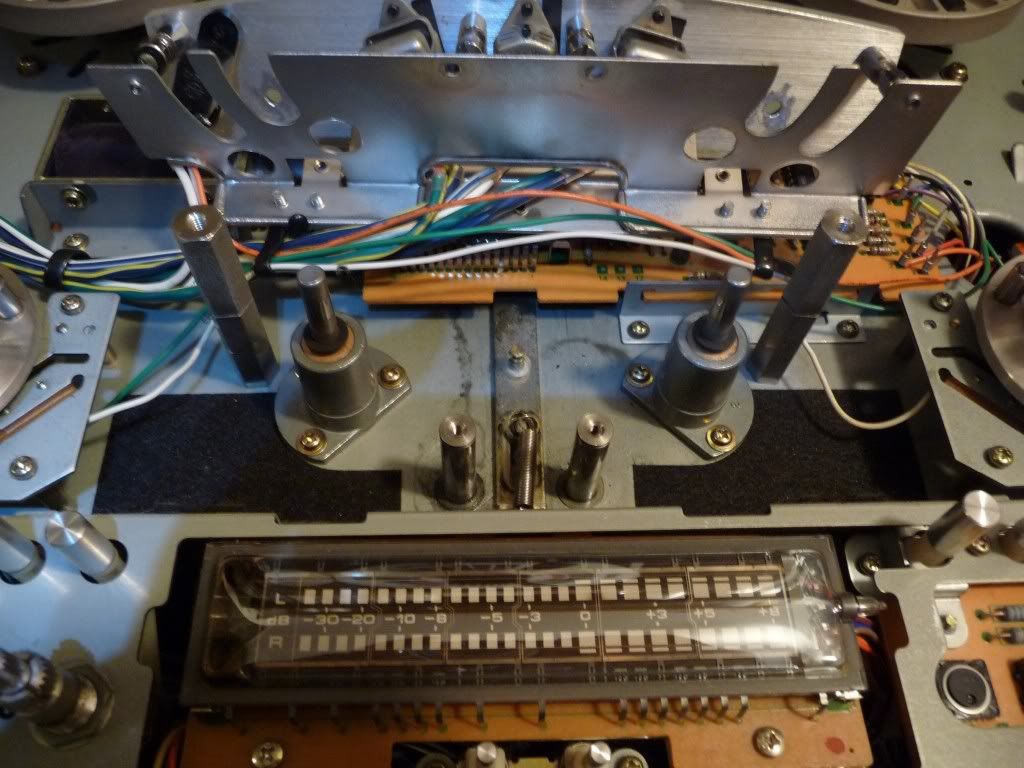
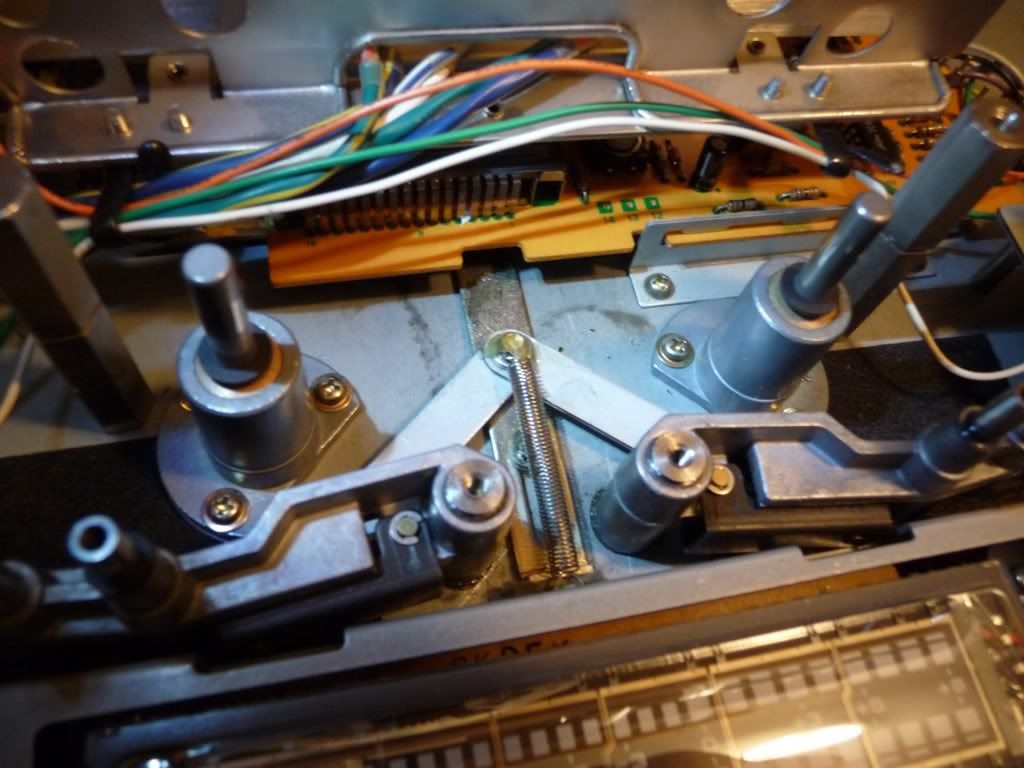
To remove these pinch roller arms is needed to remove the spring of the join, the circlip down it and each circlip of each pinch roller arm. This is the hardest part of the repair job, so be careful.
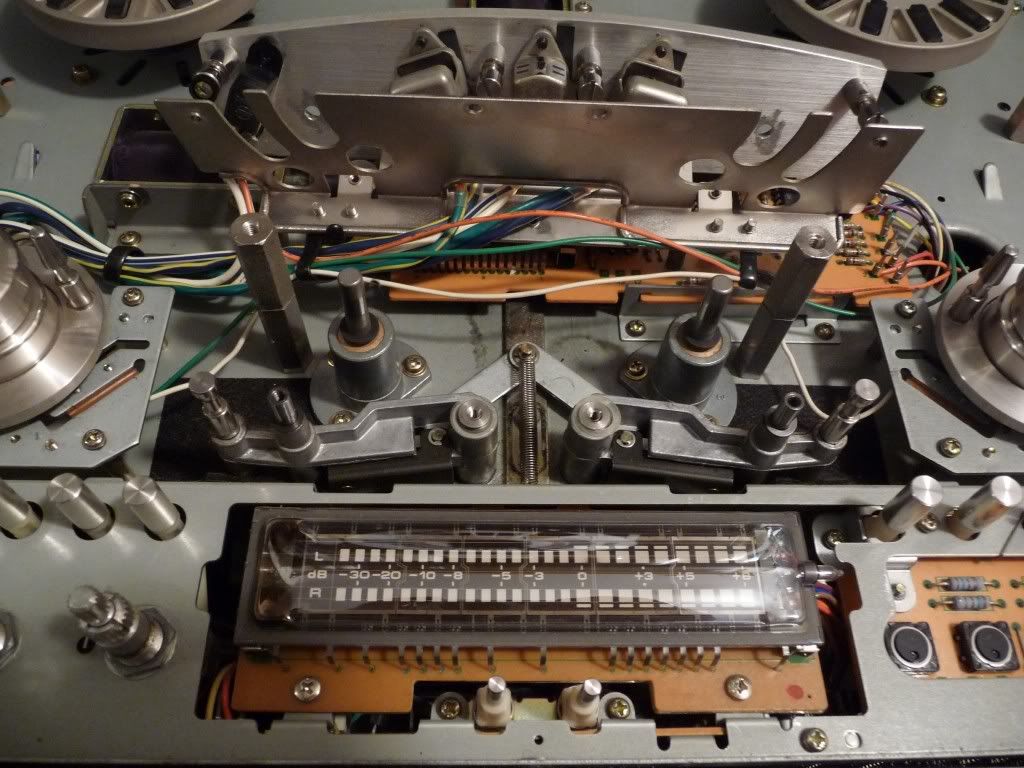
After removing the main circlips .
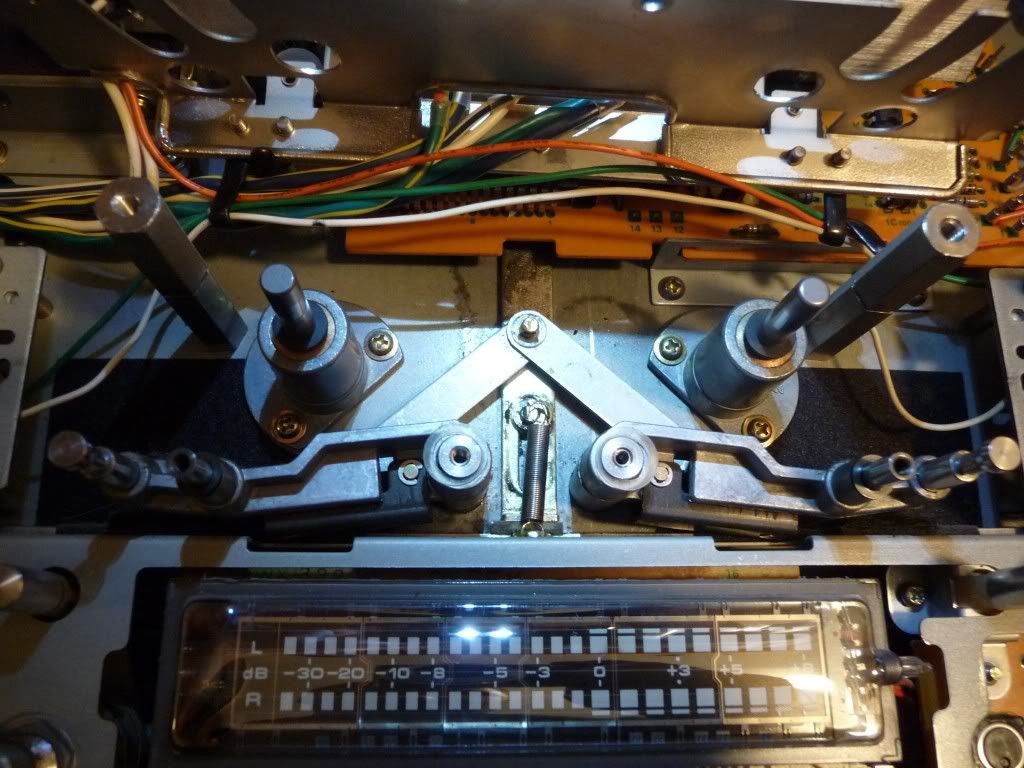
After removing the spring from the top part where is glued.
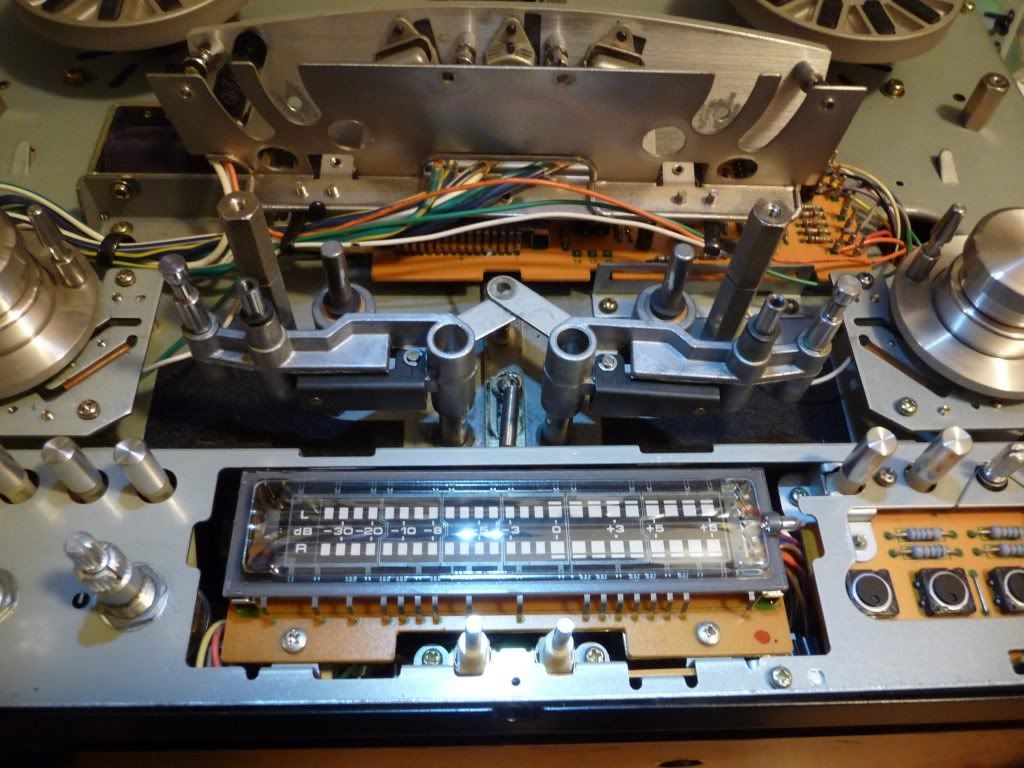
Once both pinch roller arms are free, now they can be removed.
Removing the pinch roller arms.
The pinch roller arms watched from the top while removing them.
Aspect of the chasis once both pinch roller arms have been removed.
I cleaned both the inner part of them and the axis of the chasis where they were placed. All there is full of grease in bad state, so after removed it I put new grease in those zones using a cotton swab.
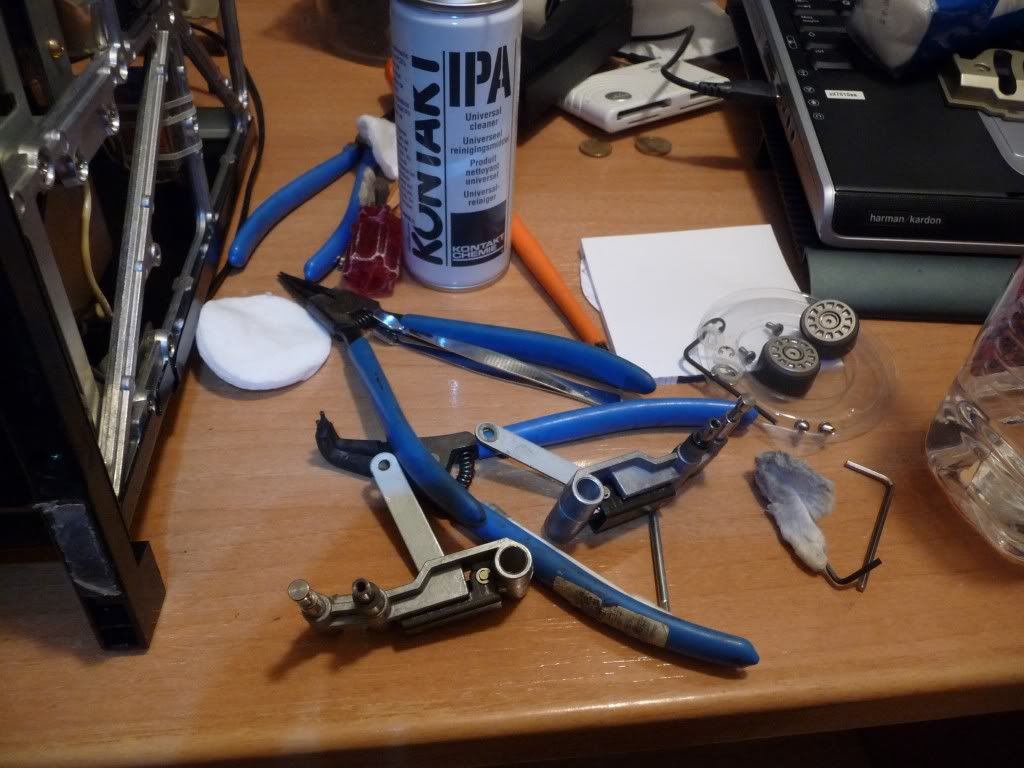
The pinch roller arms in the bench and some of the tools used in the process.
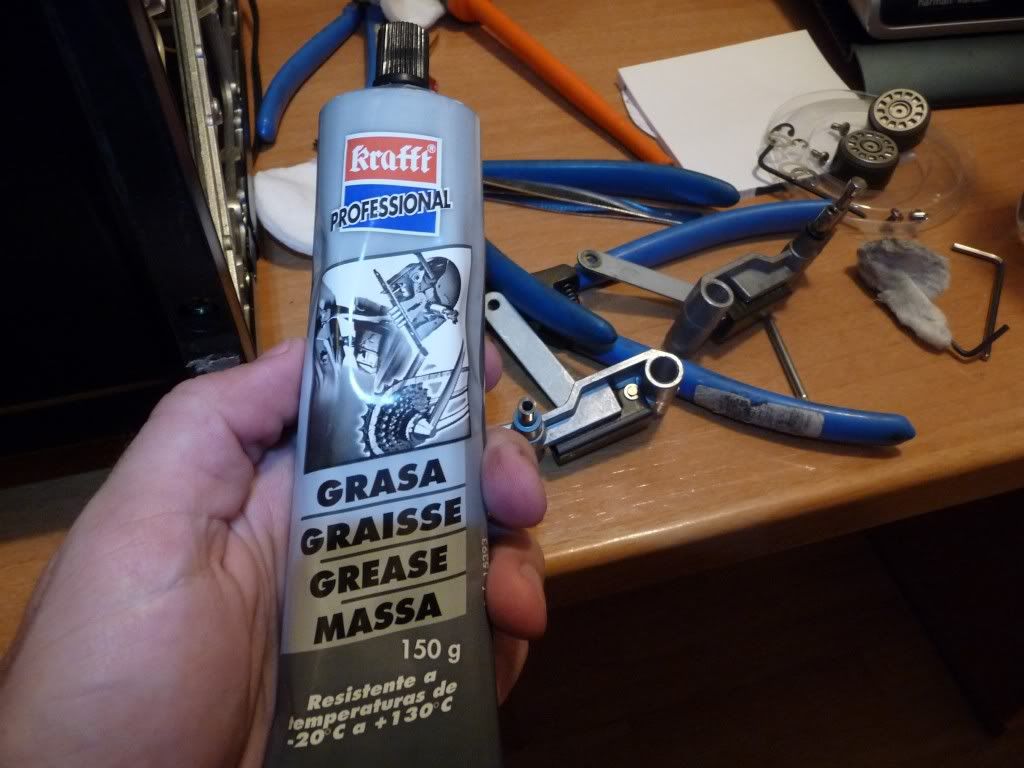
New grease that will be used to lubricate the moving parts.
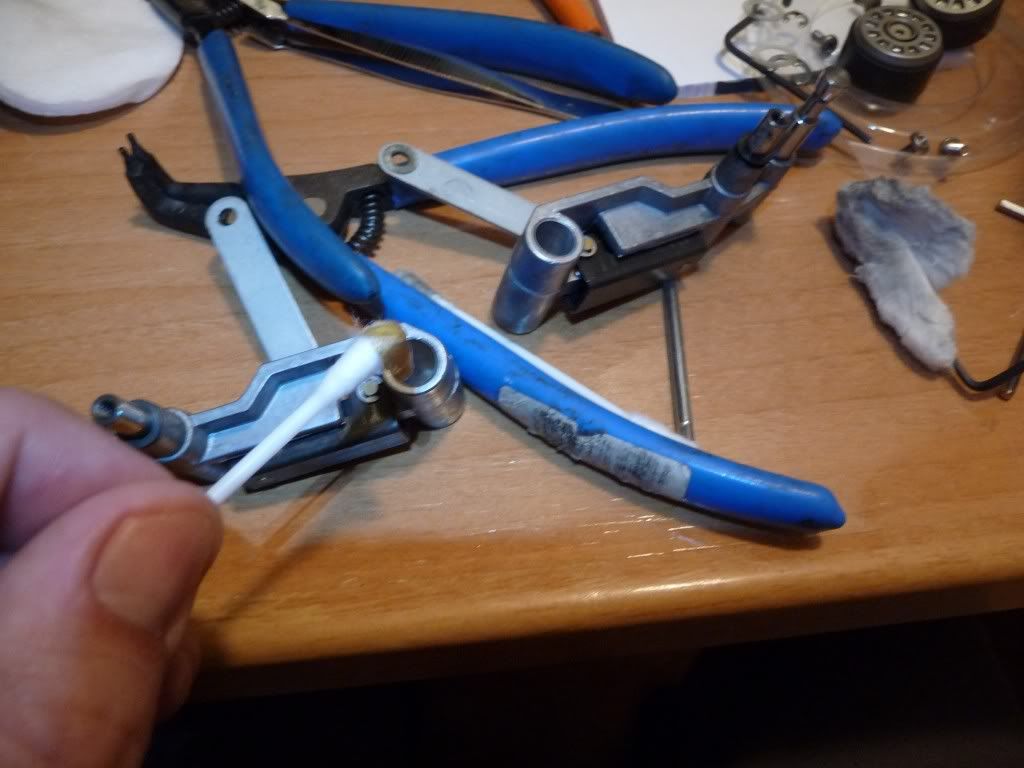
Applying new grease to the inner part of the pinch roller arms.
New grease put in the axis of the pinch roller arms.
Now is time to come back from the previous steps to mount all again. After put both pinch roller arms and place the spring in its original place, I glued it again so that it gets secure there.
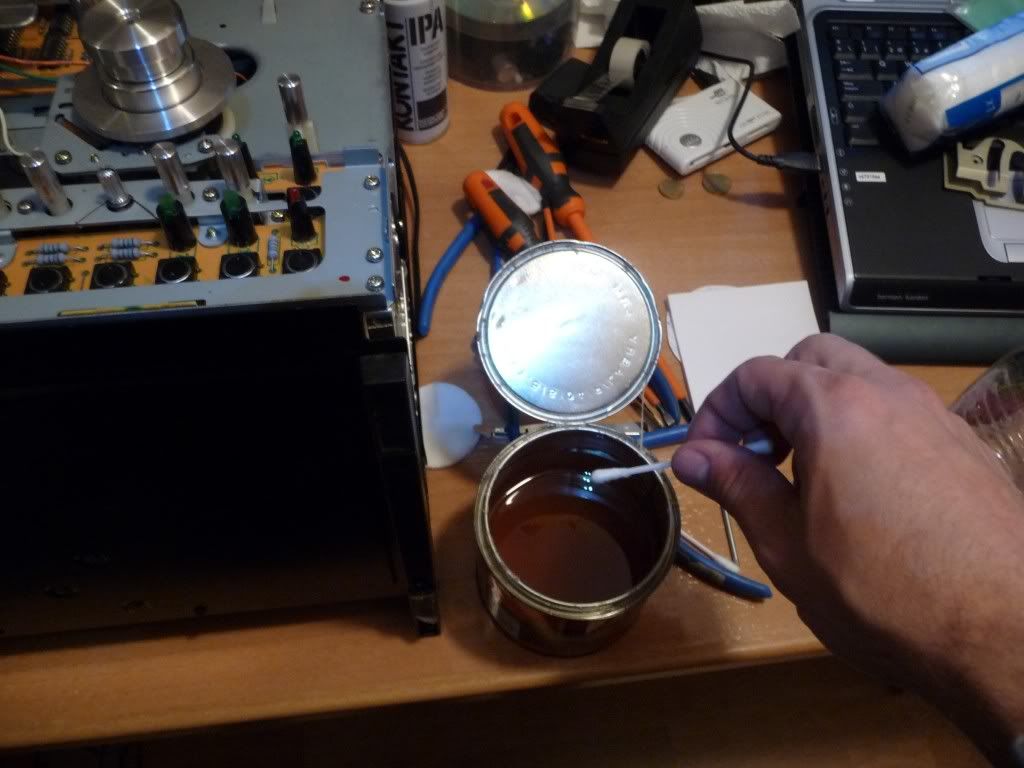
Soaking a cotton swab in glue.
Before putting back the main circlips and after glue the spring.
After mounting the pinch roller arms, I tested the result.
Being useful that was everything disassembled, I cleaned the panels and the buttons covers using an aluminium cleaner.
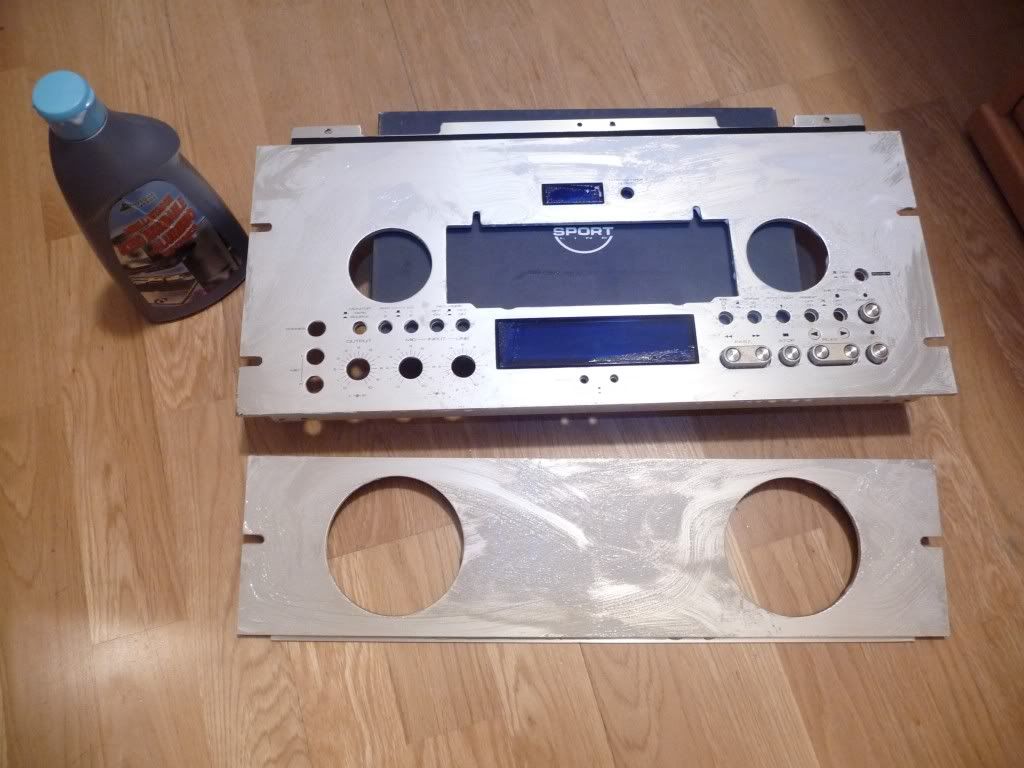
Cleaning the front panels.
To put the lower panel in its original place isn't as easy as you can think in a first watch, so take it easy and don't force anything, it must be put in its right place and no force is needed.
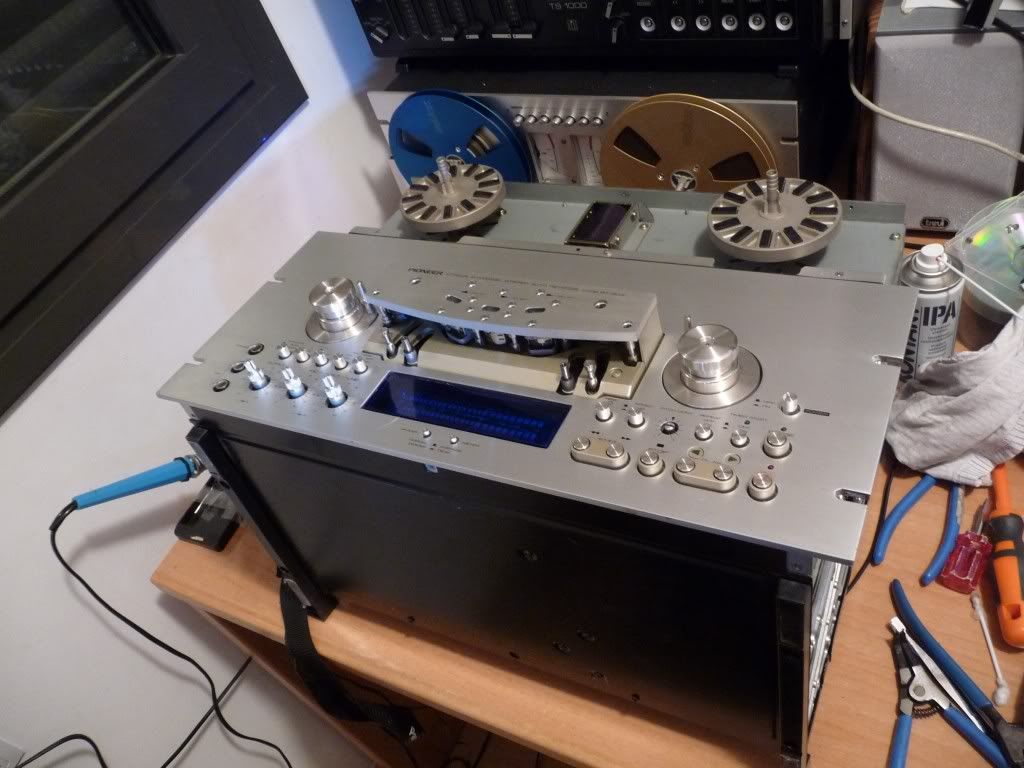
Mounting the panels.
Here is a video showing the final result:
To solve this problem is needed to do some work inside the machine, isn't too complicated, but are needed some tools to open class E circlips (retaining rings / E-clips).
First of all I removed eight philips screws, four per side, to remove the black cover. The top front panel has three philips screws in the top of it. Once they are removed, the top front panel can be removed pulling it from the top against you.
To remove the lower front panel is better to place the deck horizontally. Take care with the back panel because there are the input and output cinch connectors and the voltage selector (not present in all units, only in global models).
With the deck horizontally I removed three philips screws in the bottom and another three in the top of the panel. Next step is to remove the buttons covers from output volume, mic input, line input and pinch control. Is better to remove also the pinch rollers taking care not to lose all washers and screws. Before remove the bottom panel, look carefully how is mounted in the bottom part.
Both front panels and the head block removed .
With both front panels removed I went on with the head cover. Is needed an allen screwdriver to remove the two biggest screws in the head cover (they are black). I think that now all the head block can be moved just pulling it carefully, however I prefered to remove also the screws that fix the bottom thin piece that is linked to the head block.
The pieces that are directly responsible of the problem are the two arms where are mounted the pinch rollers. Both arms come together in an unique branch that is attached by a thin deck to the pinch roller solenoid. Each of those arms is mounted over a cylindrical axis and the grease between the axis and the pinch roller arm is solidified.
The two pinch roller arms that must be removed to clean them.
To remove these pinch roller arms is needed to remove the spring of the join, the circlip down it and each circlip of each pinch roller arm. This is the hardest part of the repair job, so be careful.
After removing the main circlips .
After removing the spring from the top part where is glued.
Once both pinch roller arms are free, now they can be removed.
Removing the pinch roller arms.
The pinch roller arms watched from the top while removing them.
Aspect of the chasis once both pinch roller arms have been removed.
I cleaned both the inner part of them and the axis of the chasis where they were placed. All there is full of grease in bad state, so after removed it I put new grease in those zones using a cotton swab.
The pinch roller arms in the bench and some of the tools used in the process.
New grease that will be used to lubricate the moving parts.
Applying new grease to the inner part of the pinch roller arms.
New grease put in the axis of the pinch roller arms.
Now is time to come back from the previous steps to mount all again. After put both pinch roller arms and place the spring in its original place, I glued it again so that it gets secure there.
Soaking a cotton swab in glue.
Before putting back the main circlips and after glue the spring.
After mounting the pinch roller arms, I tested the result.
Being useful that was everything disassembled, I cleaned the panels and the buttons covers using an aluminium cleaner.
Cleaning the front panels.
To put the lower panel in its original place isn't as easy as you can think in a first watch, so take it easy and don't force anything, it must be put in its right place and no force is needed.
Mounting the panels.
Here is a video showing the final result: